
Recently, I set up a PyPi Server to host my package installation files. I used an Ubuntu system with Docker for the setup, and I’ll document the process here.
I assume the reader already has Docker installed on Ubuntu and is familiar with basic Docker operations. If not, you might want to first review related knowledge.
Pull the Image
docker pull pypiserver/pypiserver:latest
Create Directory
No need for much explanation, simply create a directory under your home directory to store Python packages.
mkdir ~/packages
You can choose your preferred name, but make sure to update the configuration files accordingly.
Set Up htpasswd
If you don’t want to set up a password, you can skip this step.
htpasswd is a file format used to store usernames and passwords, which PyPiServer uses for user authentication. This is a simple yet effective way to enhance PyPiServer's security.
First, install apache2-utils:
sudo apt install apache2-utils
Then, use the following command to create a new .htpasswd file:
htpasswd -c ~/.htpasswd [username]
It will prompt you to enter the password for username. After entering the password, the .htpasswd file will be created in your home directory. Once the file is created, we can run pypiserver with the docker run command and use the .htpasswd file for authentication.
Mount as a Background Service
To run the Docker container as a background service, we will use Docker Compose and Systemd.
If you haven't installed Docker Compose yet, follow the installation instructions:
Note that Docker Compose has undergone significant updates recently, and many commands have changed. The most notable change is that the previously used docker-compose command is now simply docker compose.
To install the latest version of Docker Compose, follow these steps:
sudo apt update
sudo apt install docker-compose-plugin
Check if Docker Compose is installed correctly:
docker compose version
Create Configuration File
Create a docker-compose.yml file in a convenient location and add the following content:
version: "3.3"
services:
  pypiserver:
    image: pypiserver/pypiserver:latest
    volumes:
      - /home/[username]/auth:/data/auth
      - /home/[username]/packages:/data/packages
    command: run -P /data/auth/.htpasswd -a update,download,list /data/packages
    ports:
      - "8080:8080"
- Make sure to replace
[username]with your actual username. - You can modify the external port mapping, for example:
"18080:8080".
You can refer to the example provided by pypiserver here: docker-compose.yml
If you don’t want to set up a password for authentication, modify the command line in the docker-compose.yml file as follows:
command: run -a . -P . /data/packages --server wsgiref
Create Systemd Service
Create a configuration file for the service:
sudo vim /etc/systemd/system/pypiserver.service
Add the following content:
[Unit]
Description=PypiServer Docker Compose
Requires=docker.service
After=docker.service

[Service]
WorkingDirectory=/path/to/your/docker-compose/directory
ExecStart=/usr/bin/docker compose up --remove-orphans
ExecStop=/usr/bin/docker compose down
Restart=always

[Install]
WantedBy=multi-user.target
- Make sure to replace
/path/to/your/docker-compose/directorywith the actual path where yourdocker-compose.ymlfile is located, without the filename. - Verify that the Docker path is correct by using
which dockerif needed.
Start the Service
Tell systemd to reload the new service configuration:
sudo systemctl daemon-reload
Start the service:
sudo systemctl enable pypiserver.service
sudo systemctl start pypiserver.service
Check the Status
To check the current status of the service, use:
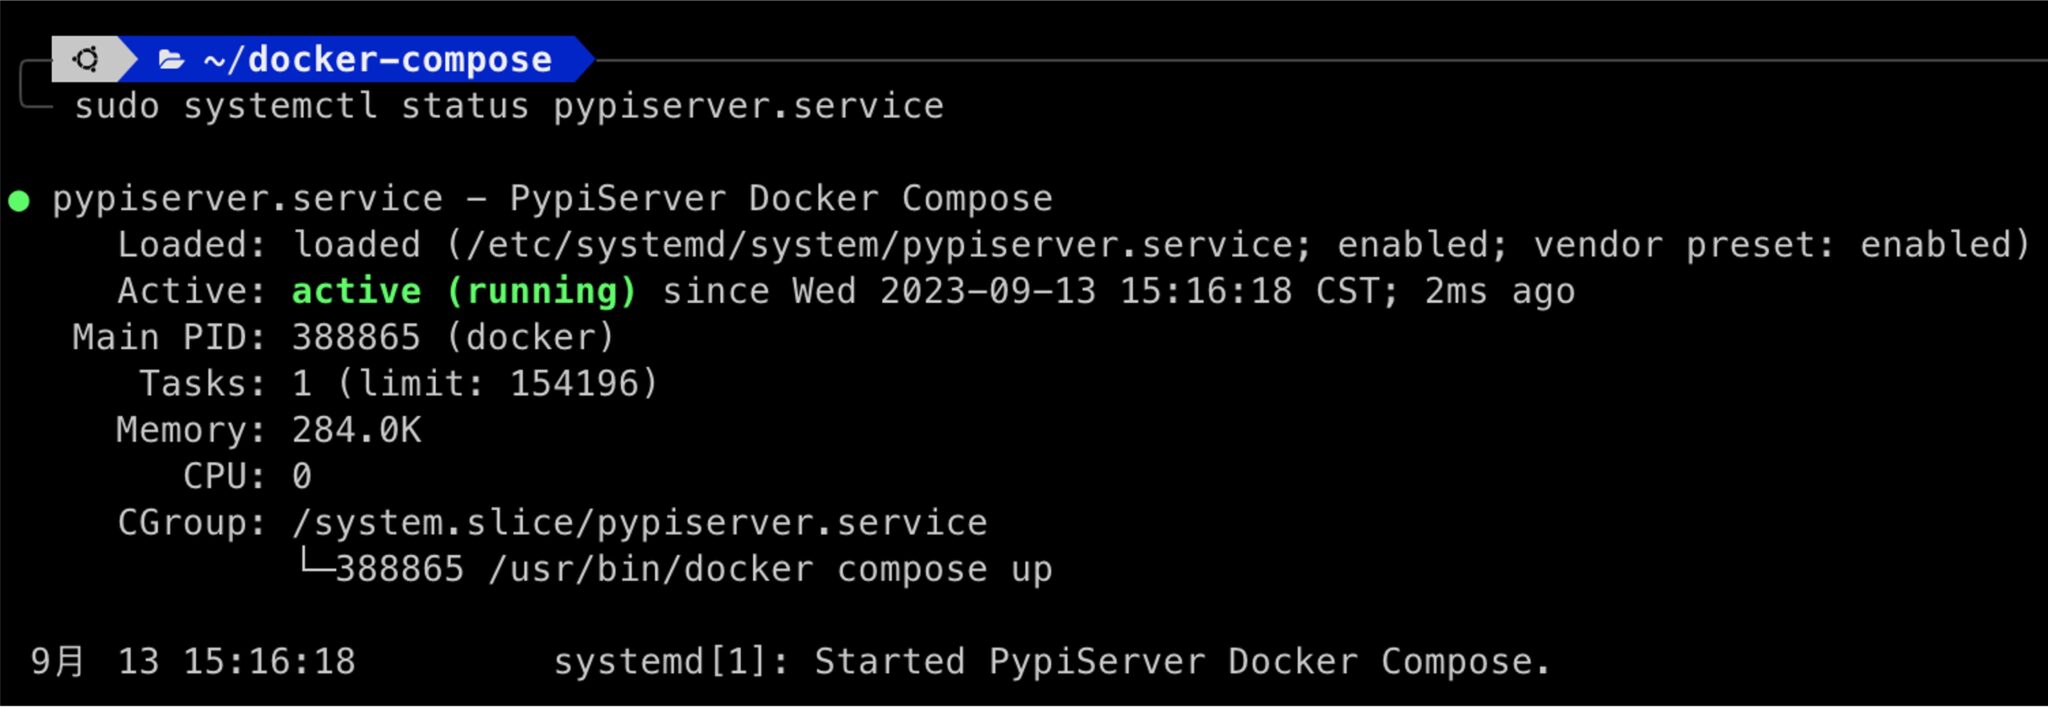
sudo systemctl status pypiserver.service
This will show the current status of the pypiserver service, including whether it is running and the most recent log output.
Get Started
Now, you can start using pip to install and upload packages.
Upload a Package
Let’s assume we have a package named example_package-0.1-py3-none-any.whl. Use twine to upload the package:
pip install twine
twine upload --repository-url http://localhost:8080/ example_package-0.1-py3-none-any.whl
- Make sure that
localhost:8080is the correct address and port of your PyPiServer.
Download and Install a Package
To install a package, specify the address and port of your PyPiServer:
pip install --index-url http://localhost:8080/ example_package
Use Basic Authentication
If you have set up basic authentication for your PyPiServer, you will need to provide credentials when uploading or downloading packages:
-
Upload a package:
twine upload \
  --repository-url http://localhost:8080/ \
  --username [username] \
  --password [password] \
example_package-0.1-py3-none-any.whl -
Install a package:
pip install \
  --index-url http://[username]:[password]@localhost:8080/ \
  example_package
Set Up pip.conf
If you often install packages from this server, you might not want to specify the --index-url every time you use pip install. Instead, you can add the related configuration to your pip.conf.
Configuration File
The pip.conf file can exist in several places, and they are checked in the following order of priority:
-
Priority 1: Site-level configuration file:
/home/[username]/.pyenv/versions/3.x.x/envs/main/pip.conf
-
Priority 2: User-level configuration file:
/home/[username]/.pip/pip.conf/home/[username]/.config/pip/pip.conf
-
Priority 3: Global configuration file:
/etc/pip.conf/etc/xdg/pip/pip.conf
Once you identify the correct pip.conf file for your current Python environment, add the following content:
[global]
index-url = http://[server-ip]:8080/
trusted-host = [server-ip]
Make sure to replace [server-ip]:8080 with the correct address and port of your PyPiServer.
After this configuration, whenever you run pip install [package_name], the system will automatically use the server address set in pip.conf as the package source.
Conclusion
Now, you should have successfully set up your own PyPi server and learned how to upload and download packages.
I hope this article helps resolve your setup issues. Your support keeps my AI & full-stack guides coming. From idea to launch—efficient systems that are future-ready. Need a tech partner or custom solution? Let's connect.☕ Fuel my writing with a coffee
![]()
![]()
AI / Full-Stack / Custom — All In
All-In Bundle
🚀 Ready for your next project?