
Working remotely using a company-configured VPN, but still wanting to use other machines on your local network.
Configuration Guide
This guide uses macOS as the operating system.
Problem Description
For example:
- Company VPN subnet: 192.168.25.XXX
- Home subnet: 192.168.1.XXX
When you connect to the VPN, all traffic is routed through the company's subnet, which means you won’t be able to connect to other machines on the same home network.
Not only that, but while you were watching a funny video at home, the company’s network administrator might have been laughing along with you. (???)
Something seems off, right?
So what we need to do is: Route only the company's subnet through the VPN, and let all other traffic use the local network.
Here, we assume that you've already configured the VPN and it's working correctly, and now we’re only addressing the traffic routing issue.
If the VPN isn’t working correctly yet, please check that your VPN settings are properly configured first.
Solution
Step one: First, identify the company’s internal subnet, such as:
- 192.168.25.XXX
This indicates that you're working with the 25 subnet. Now, let’s open a file:
sudo vim /etc/ppp/ip-up
Enter the following content, but be sure to replace it with your actual subnet:
Please note, this example assumes the VPN subnet is 192.168.25.XXX. Modify it according to your actual setup.
#!/bin/sh
/sbin/route add -net 192.168.25.0/24 -interface ppp0
Let’s explain what the command above does:
- /sbin/route: This is the path to the route command, which is used to configure network routes.
- -net 192.168.25.0/24: The parameter specifies that this is a network route, not a host route.
- 192.168.25.0/24 represents the network address and subnet mask, covering the IP range from 192.168.25.0 to 192.168.25.255.
- -interface ppp0: Specifies the network interface through which the route should be set.
- In this example, it's ppp0 (point-to-point protocol interface 0).
The whole command adds a route through the ppp0 interface to the 192.168.25.0/24 network.
When your system tries to access any IP address in the 192.168.25.0/24 network, it will route the traffic through the ppp0 interface.
After finishing the setup, save and exit the file, then give the file the correct permissions:
sudo chmod 755 /etc/ppp/ip-up
Is it still not working?
At this point, some machines may still be unable to access the internet. So, let’s move on:
Open the System Preferences on macOS and go to Network, as shown in the image below:
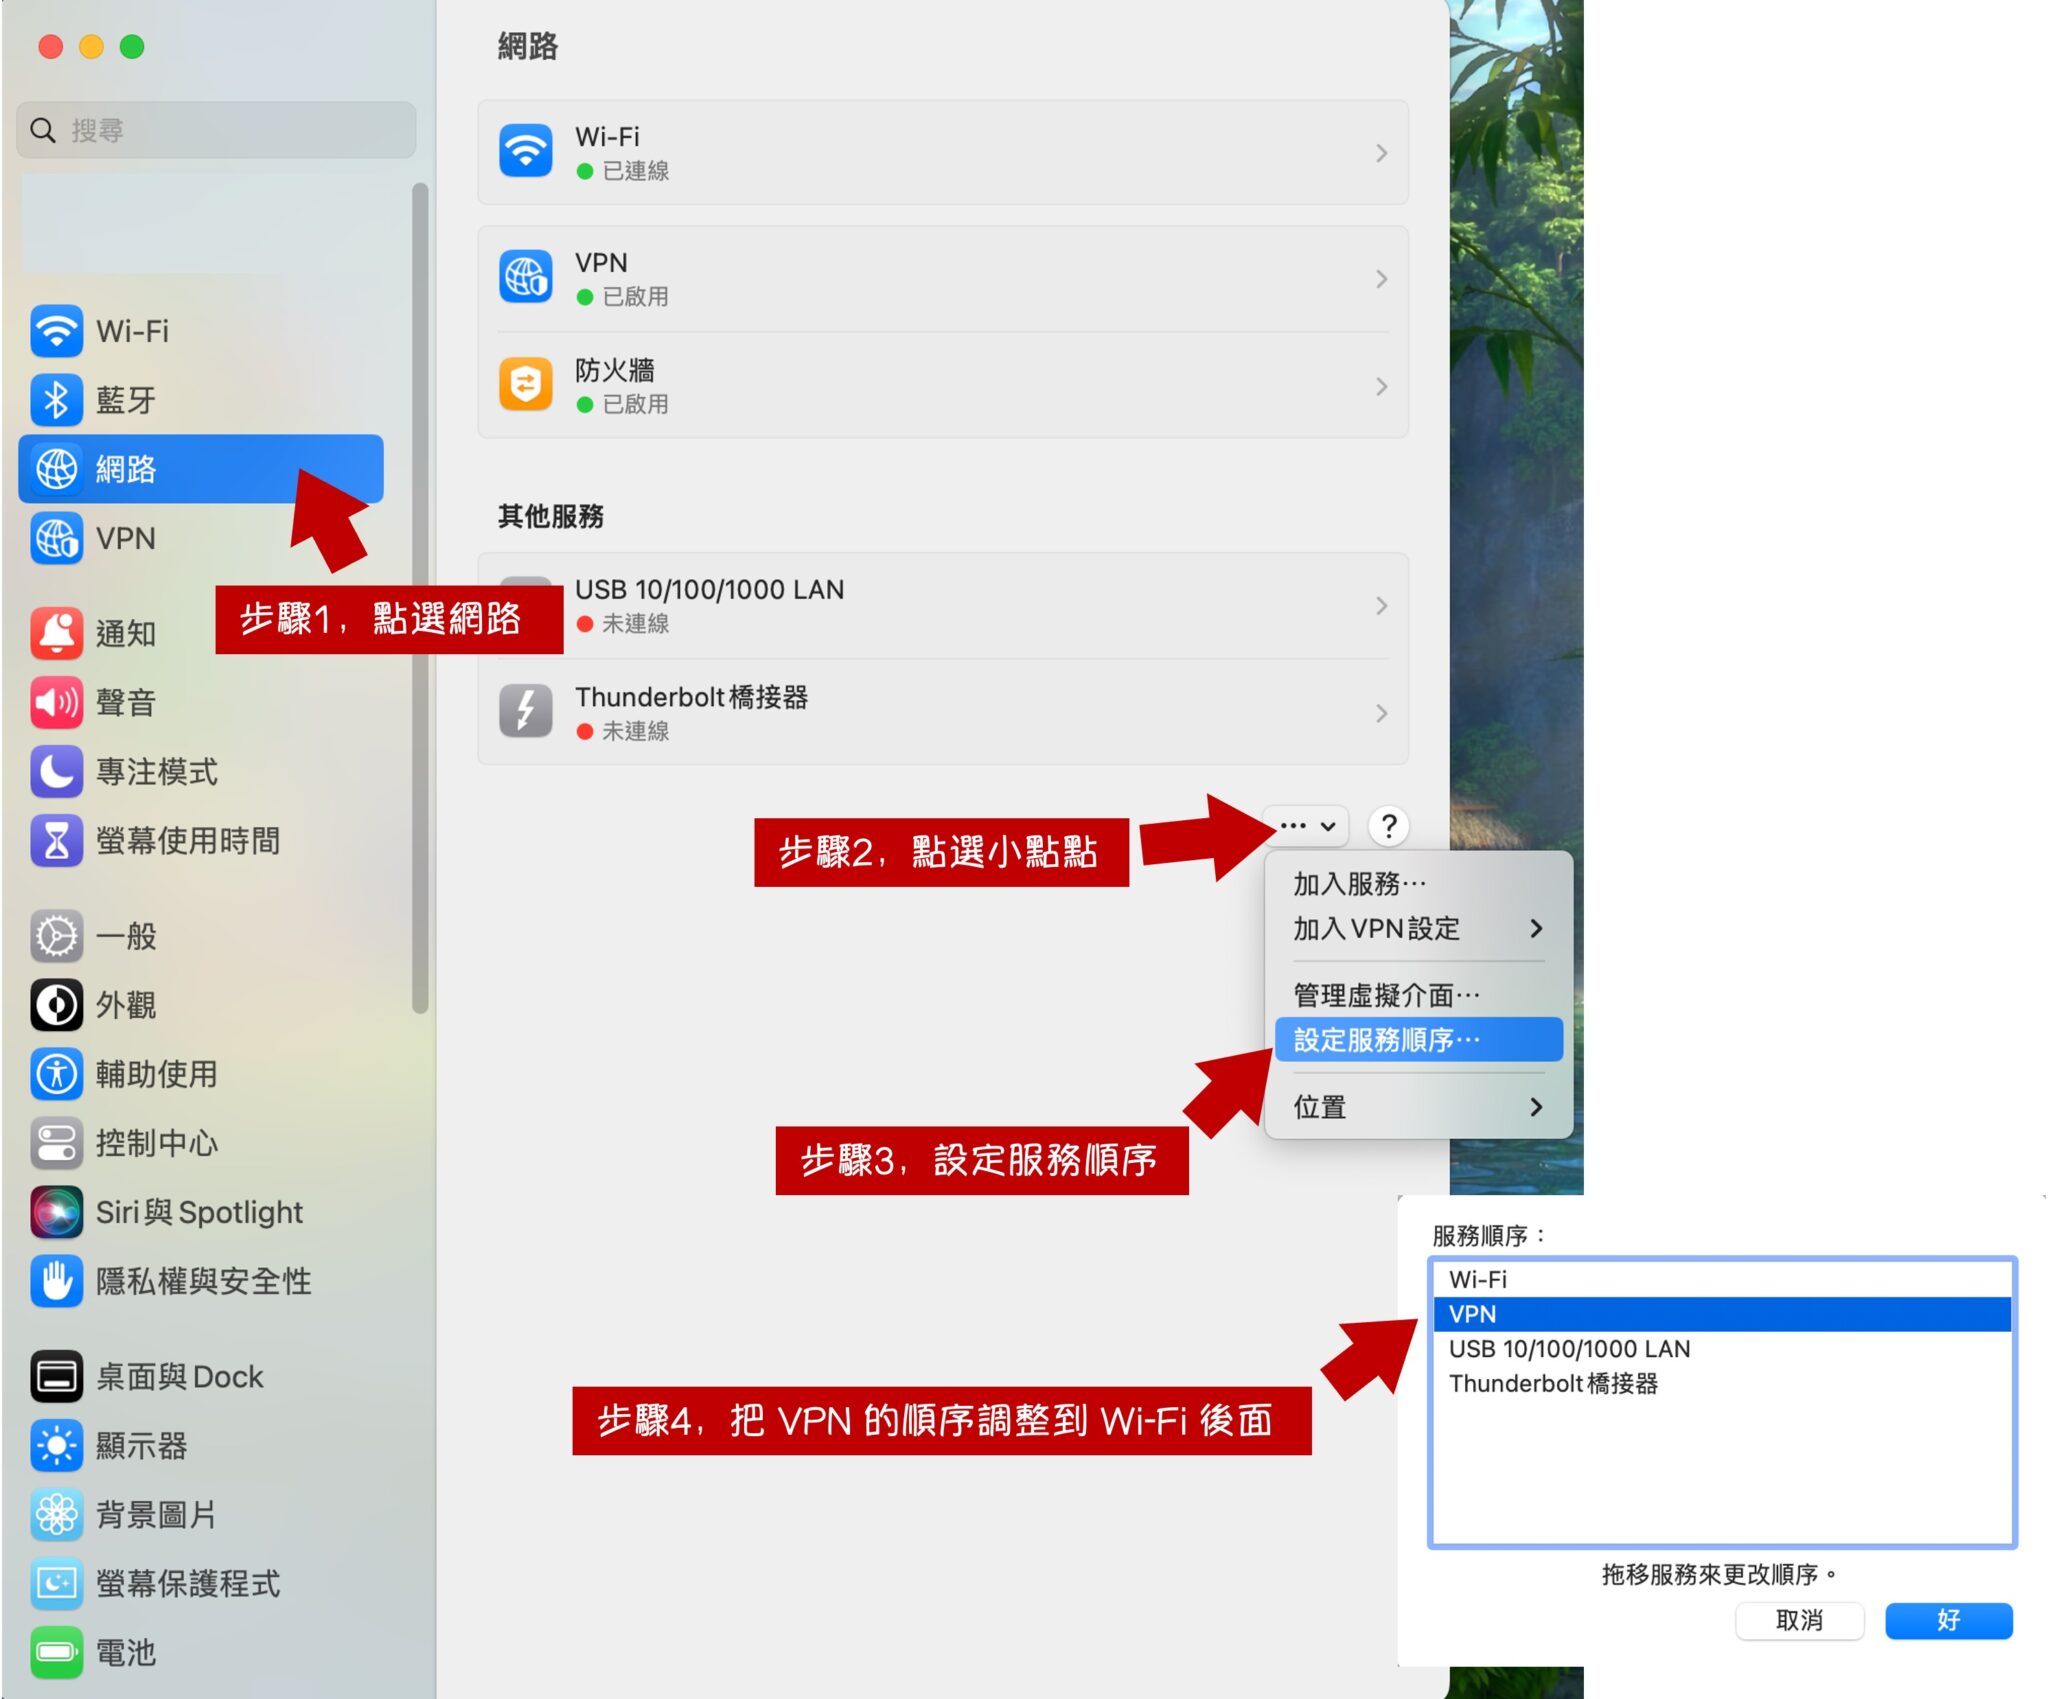
- Step 1: Open System Preferences and click on "Network."
- Step 2: Click on the small options button next to the VPN connection.
- Step 3: Select "Set Service Order."
- Step 4: Drag the VPN service below Wi-Fi in the list.
Many users, after setting up the VPN, move the VPN service to the top of the list, meaning all traffic is routed through the VPN by default.
So here, we need to move the VPN down, which will allow the network settings above it to take effect.
Once that’s done, you're all set. If you need other traffic to go through the VPN in the future, simply add the necessary routes to the ip-up file.
References
☕ Fuel my writing with a coffee
Your support keeps my AI & full-stack guides coming.
AI / Full-Stack / Custom — All In
From idea to launch—efficient systems that are future-ready.
All-In Bundle
- Consulting + Dev + Deploy
- Maintenance & upgrades
🚀 Ready for your next project?
Need a tech partner or custom solution? Let's connect.