
We attempted to enable Amazon SES, and during the verification process, Amazon required us to set up DNS records.
It took us quite some time to find the correct configuration (about half an hour).
Here, we document the process for future reference.
Amazon SES Setup
There are already comprehensive tutorials available on setting up Amazon SES. Please refer to this guide:
We followed the steps smoothly until we reached the "Verify a Sending Domain" stage—then we got stuck.
Since our domain was purchased from Namecheap, we needed to configure DNS records there.
So, how should we set it up?
DNS Records
In the Amazon SES "Verify a Sending Domain" card, click "Get DNS Records", and a pop-up window will appear containing a detailed list of DNS records, which looks something like this:
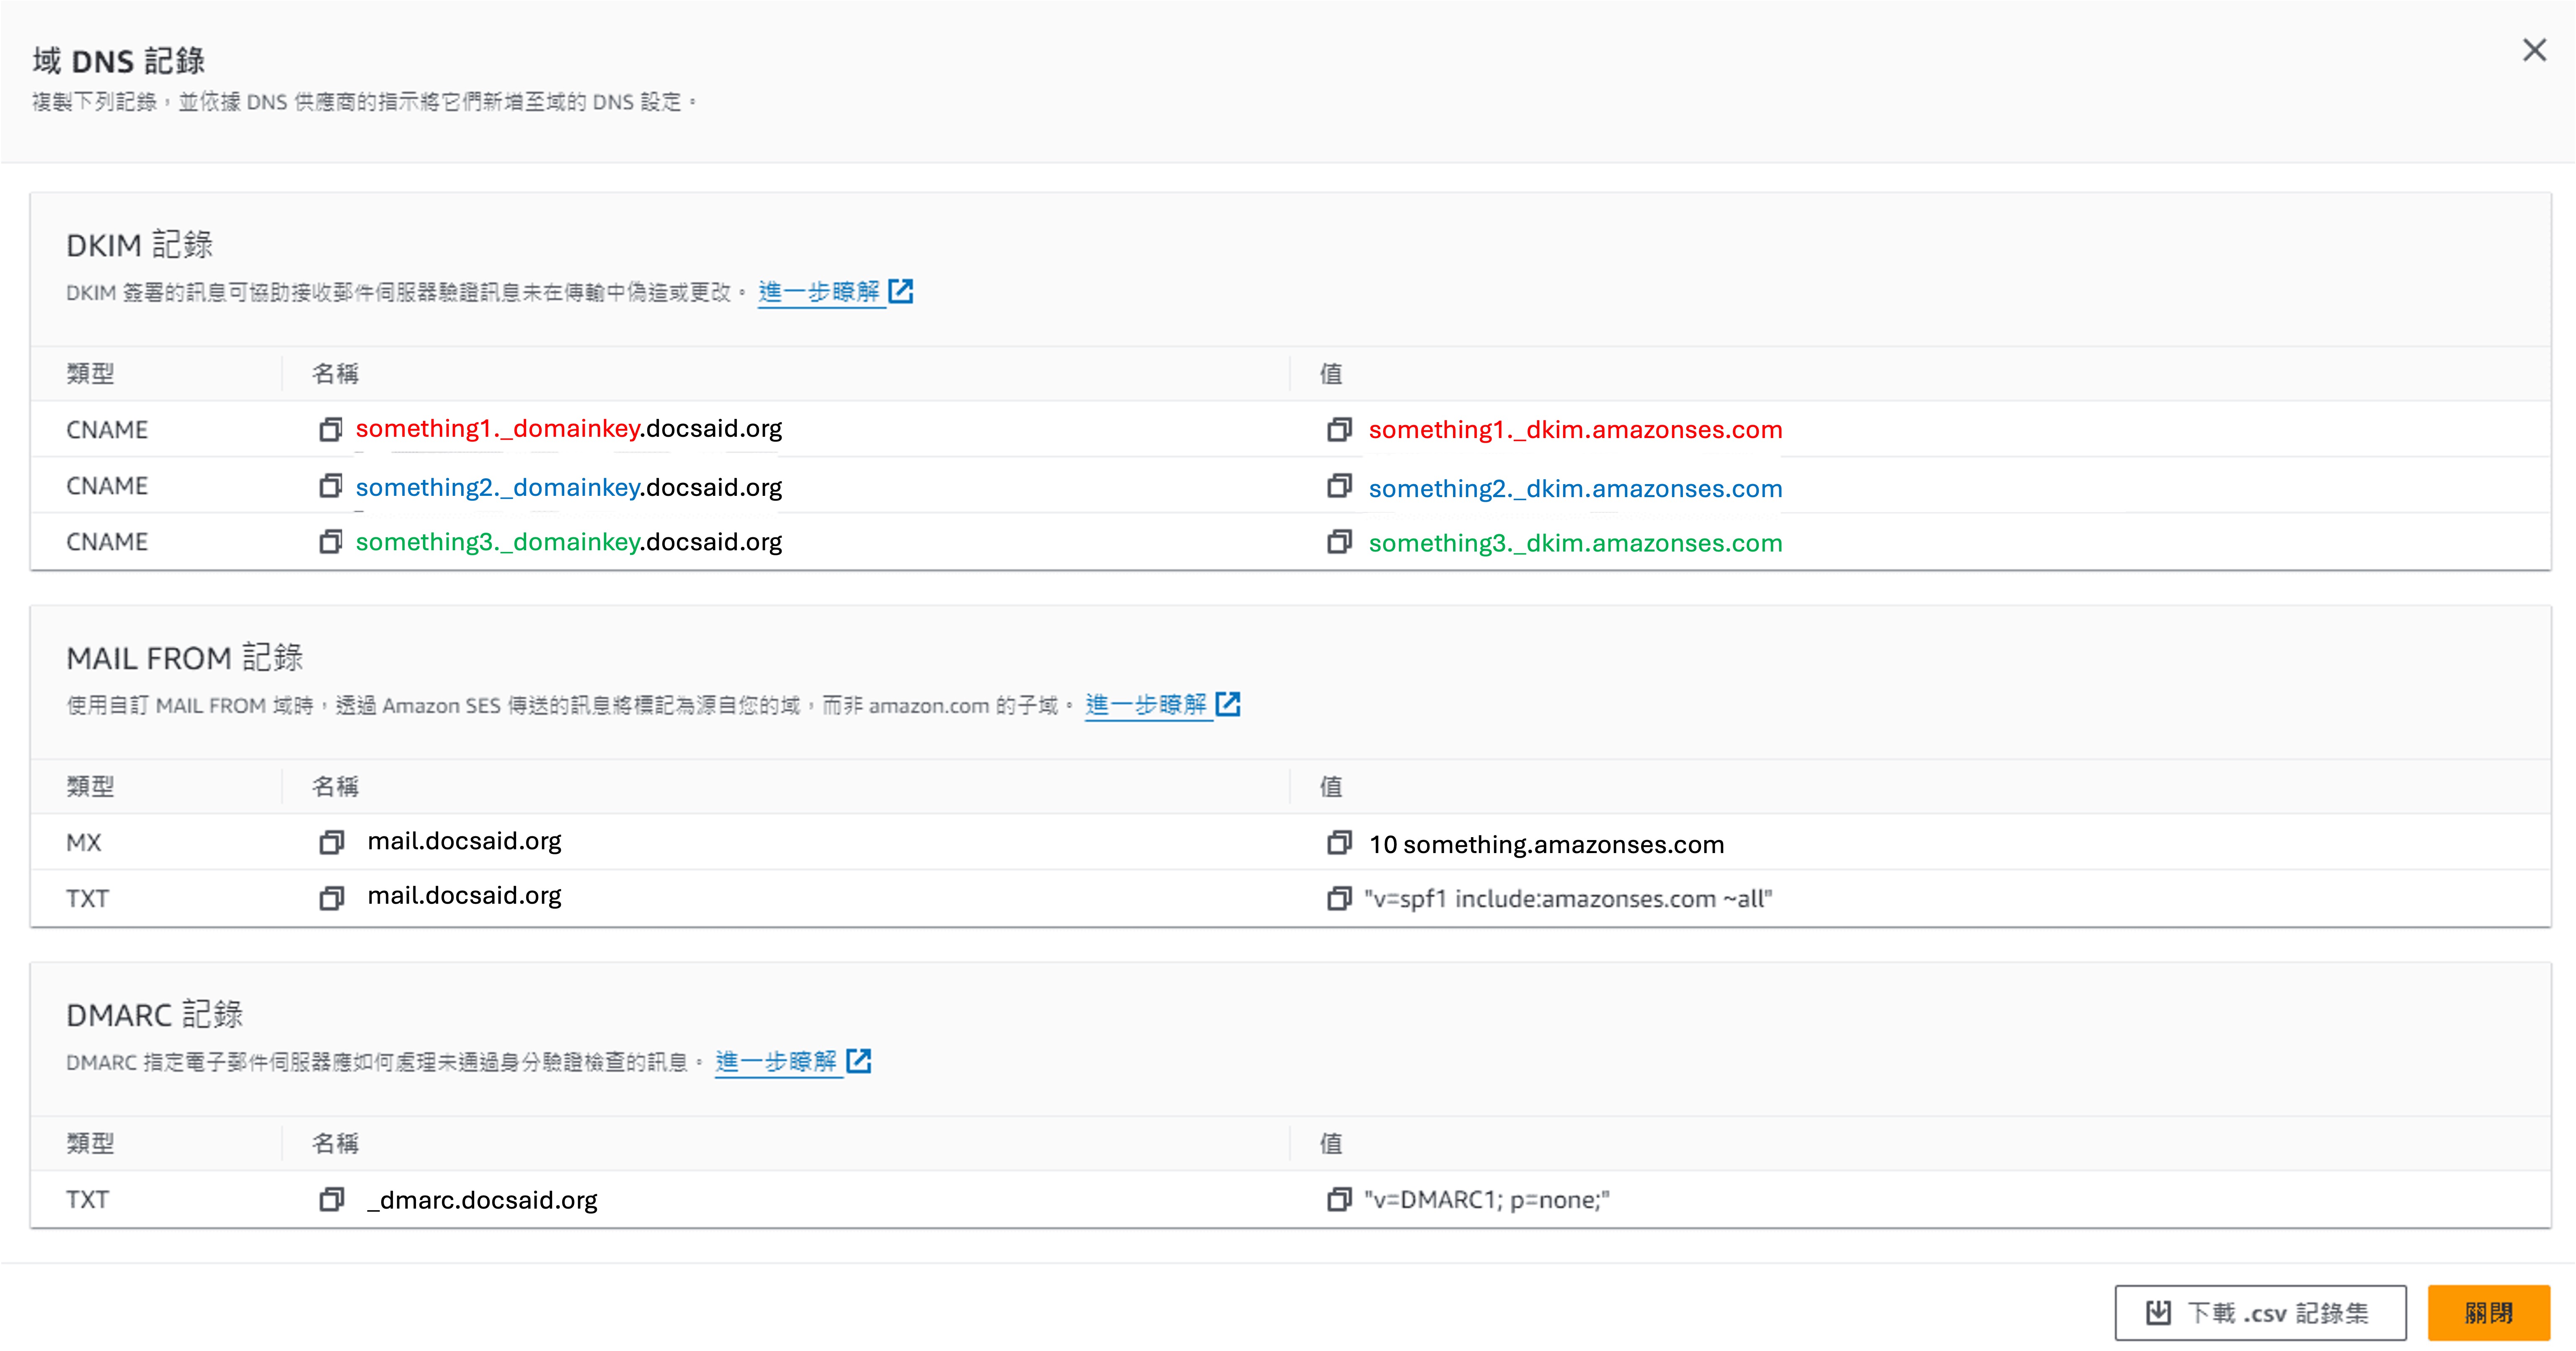
Using our domain as an example, docsaid.org in the image represents the domain we are verifying.
Once we obtain these DNS records, we can proceed with the setup in Namecheap.
The original values in each field have been slightly modified to protect our website security.
DKIM Records
Go to the Namecheap website, log in, and navigate to "Domain List". Locate the domain you need to configure and click "Manage".
In the domain management page, find "Advanced DNS" and enter the section.
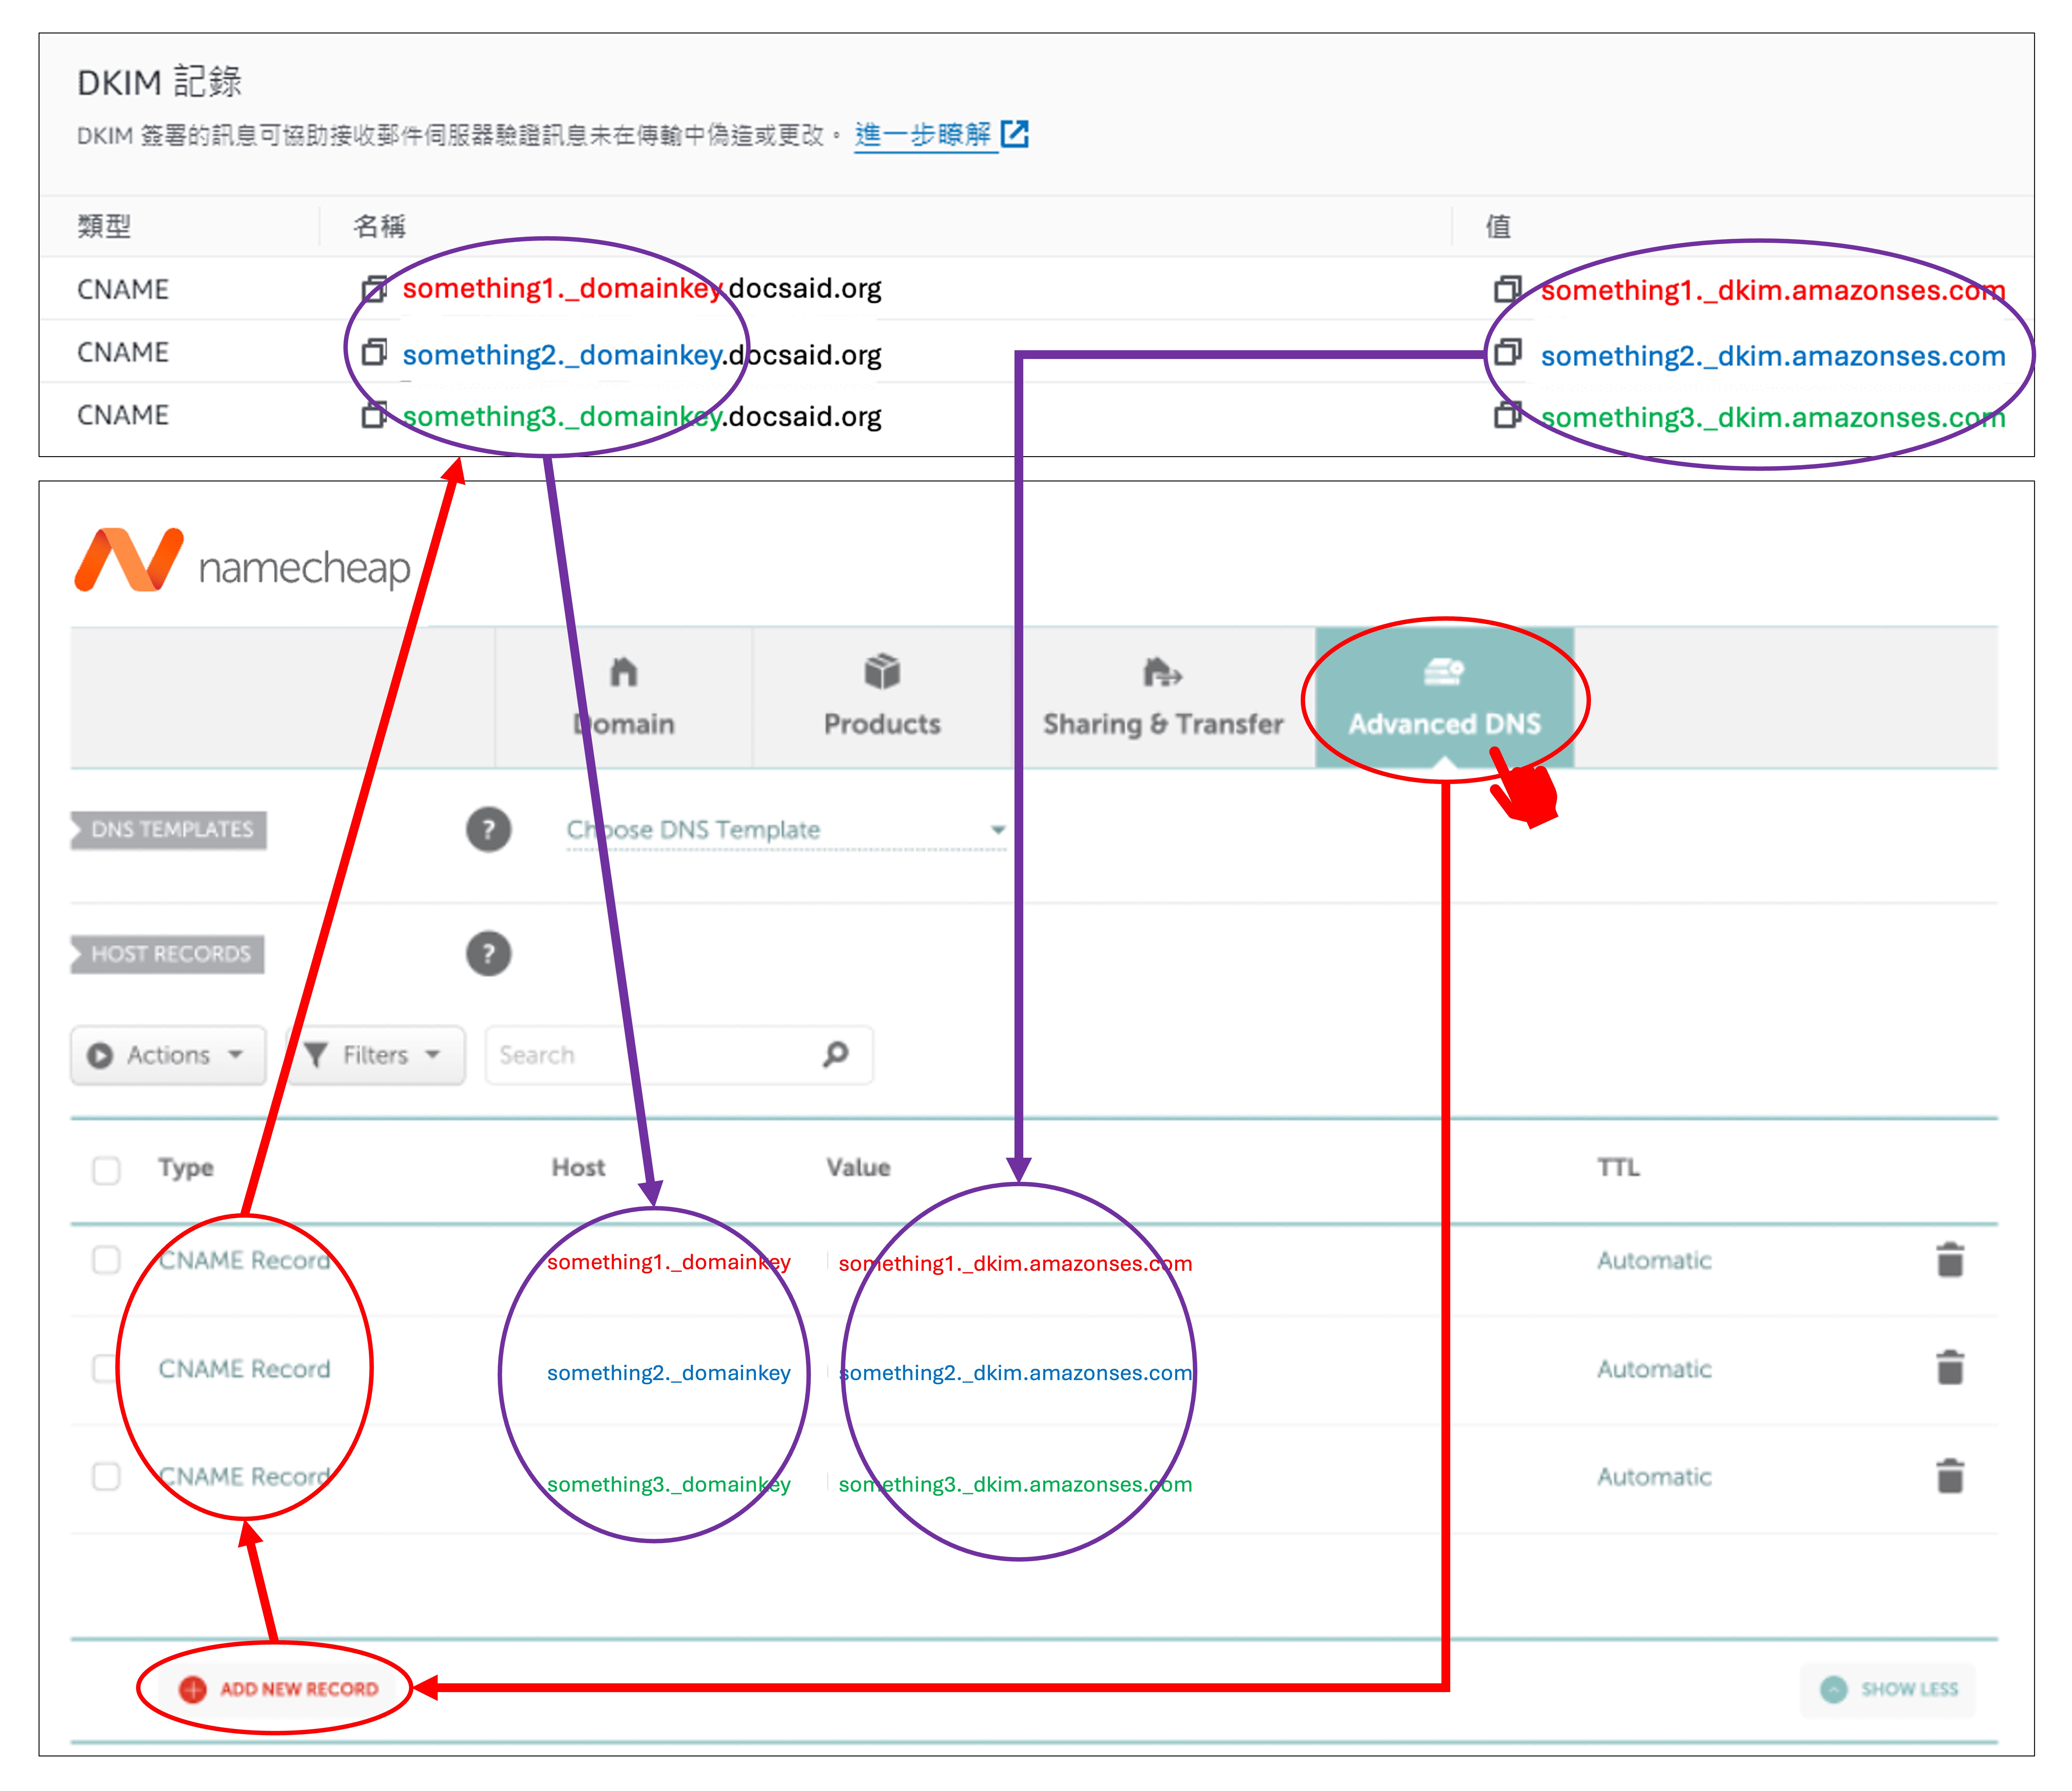
As shown in the image, there is an "Add New Record" button. Click it and select "CNAME Record".
Now, enter the DKIM records obtained earlier. Pay attention to the following details:
- The DKIM name should be entered in the
Hostfield. Only enter the part before the domain name; do not include the domain itself. - The value should be entered in the
Valuefield—simply copy and paste it.
MAIL FROM Records
This part took us the longest time because only the MX record needs to be added—the other one can be ignored.
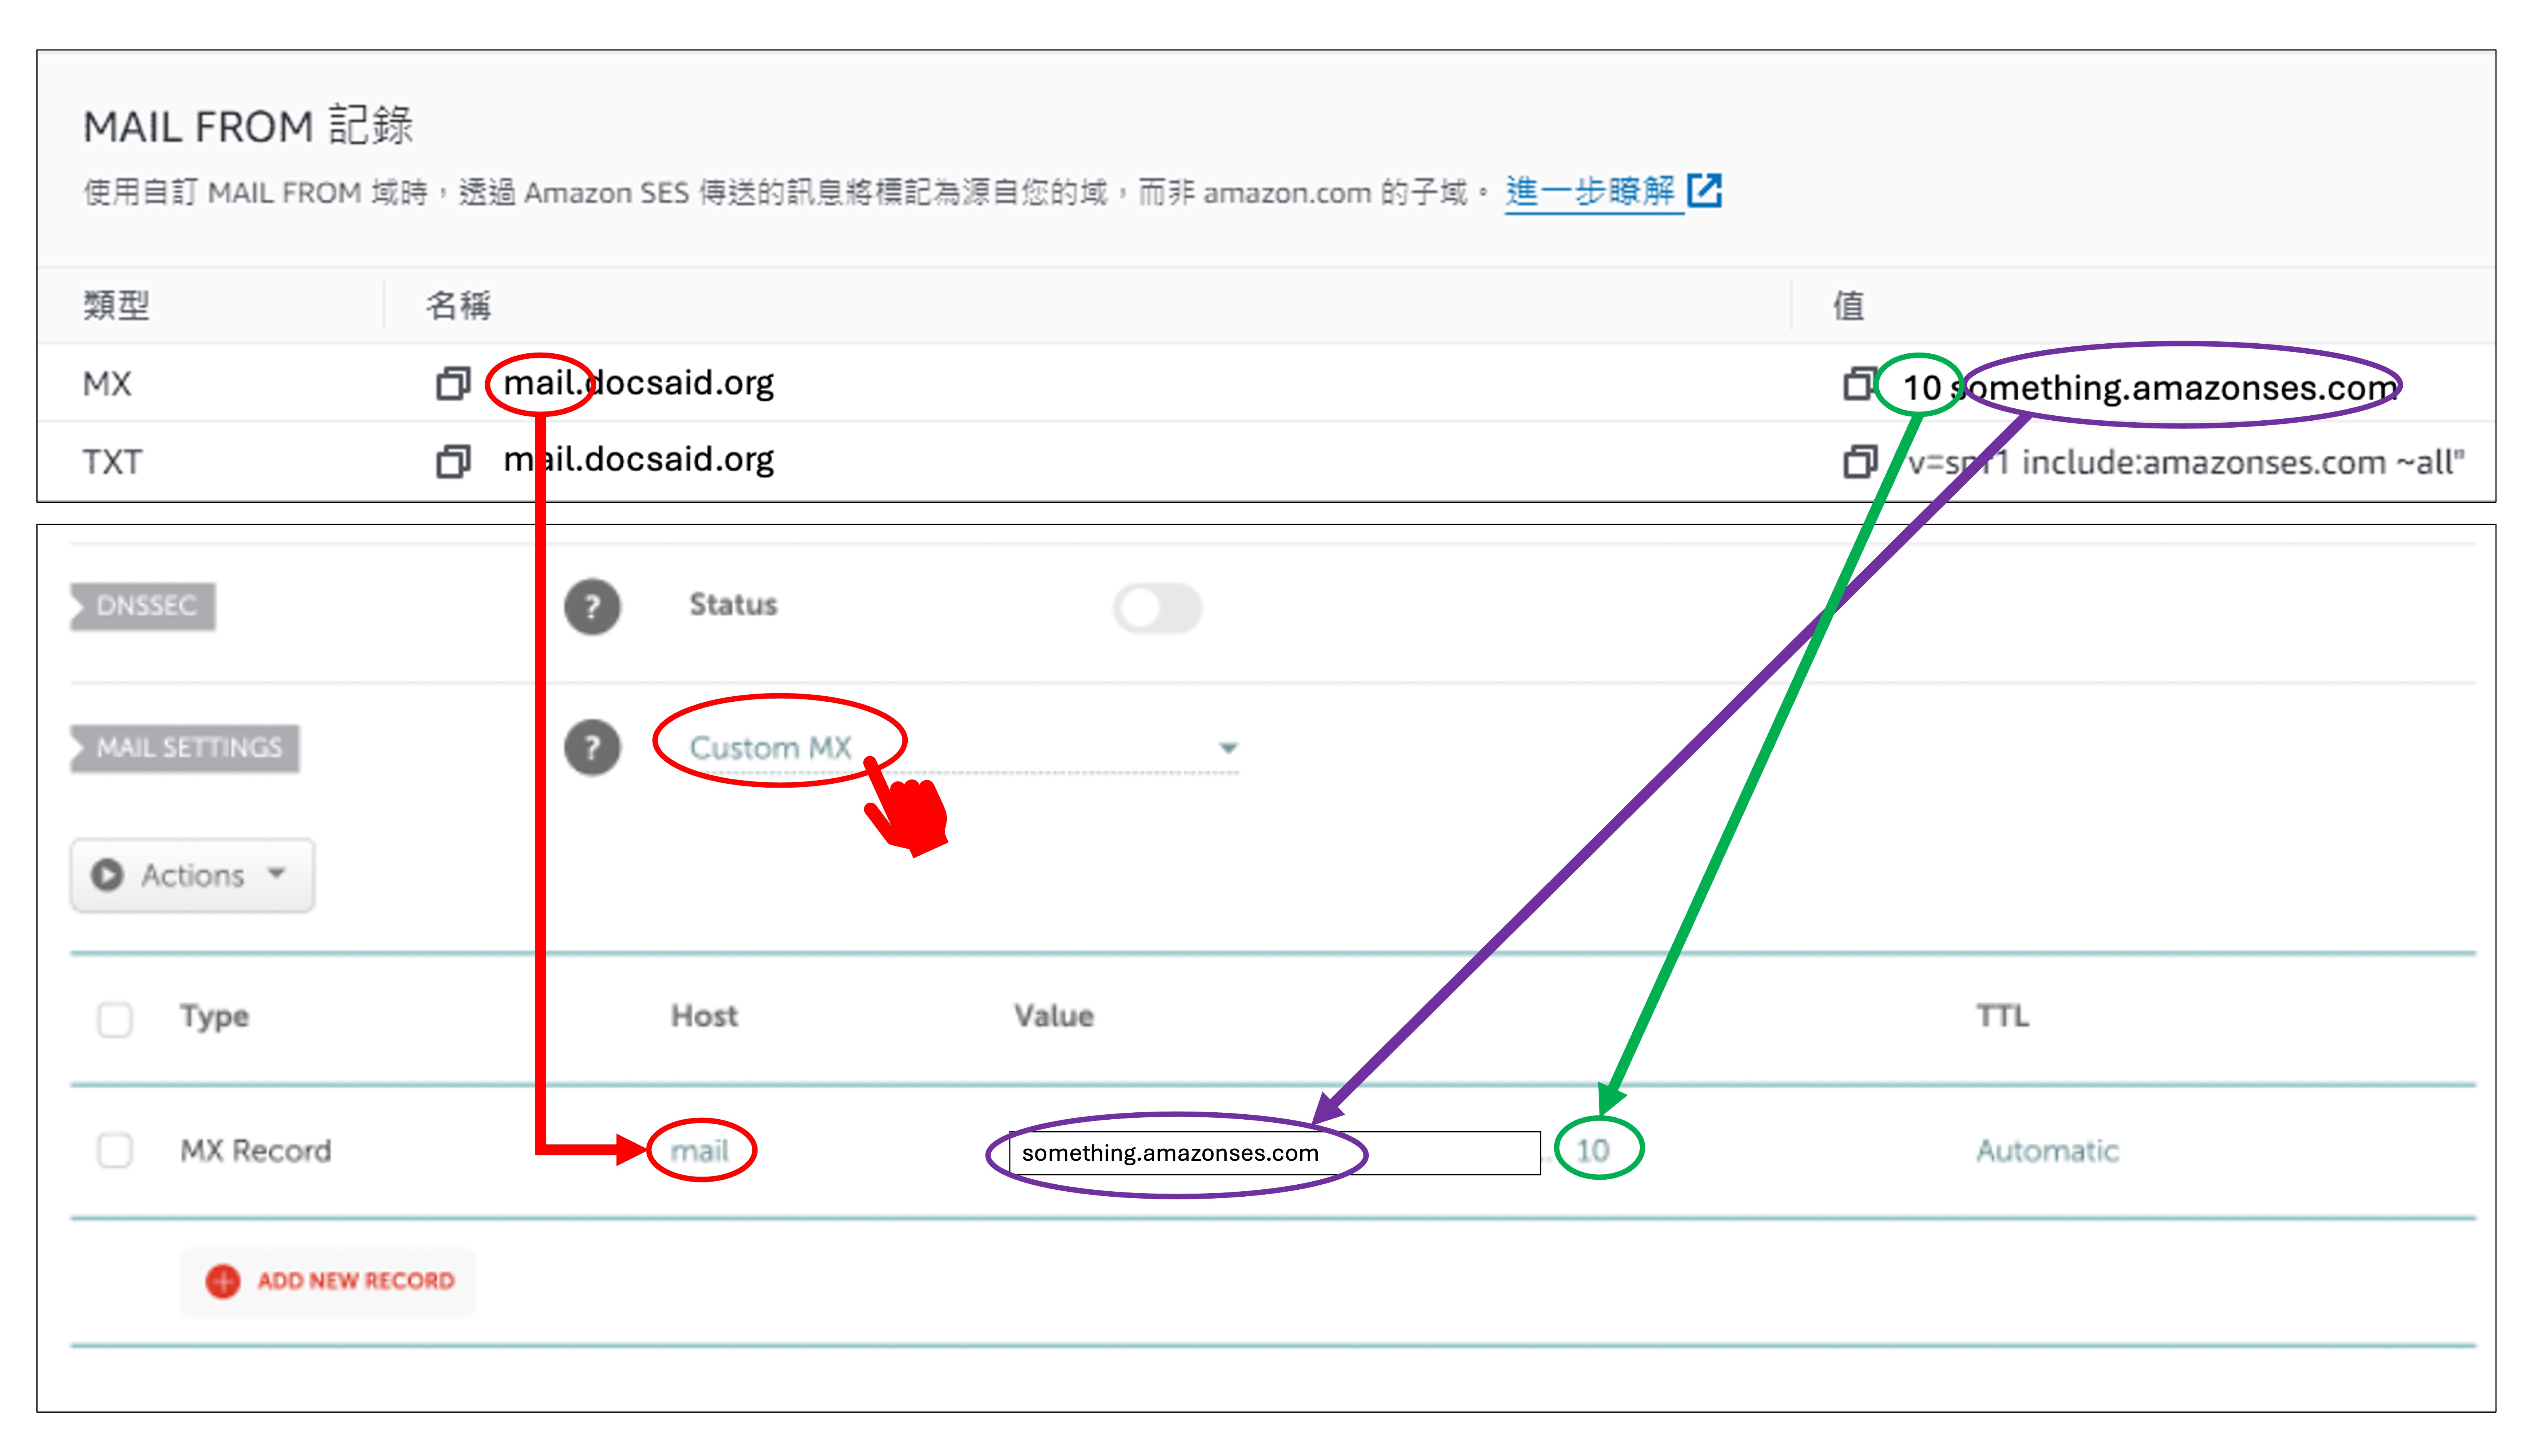
In the "Advanced DNS" section of Namecheap, locate "MAIL SETTINGS". In the dropdown menu, select "Custom MX".
Then, enter the MX record provided by Amazon SES, keeping in mind the following:
- Depending on the subdomain you configured in Amazon SES, enter the corresponding MX record in the
Hostfield. In our example, we usedmail, but if you chose a different subdomain, enter the corresponding value. - Enter the value in the
Valuefield. There are two parts:- Enter
10in the "Priority" field. - Enter the remaining part of the value in the "Value" field.
- Enter
Namecheap's Mail Settings allow only one of the following options:
- If "Email Forwarding" is enabled, Namecheap locks the MX records, restricting them to its own forwarding servers.
- If "Custom MX" is enabled, you can manually configure the MX records provided by Amazon SES, allowing it to handle bounced emails.
DMARC Records
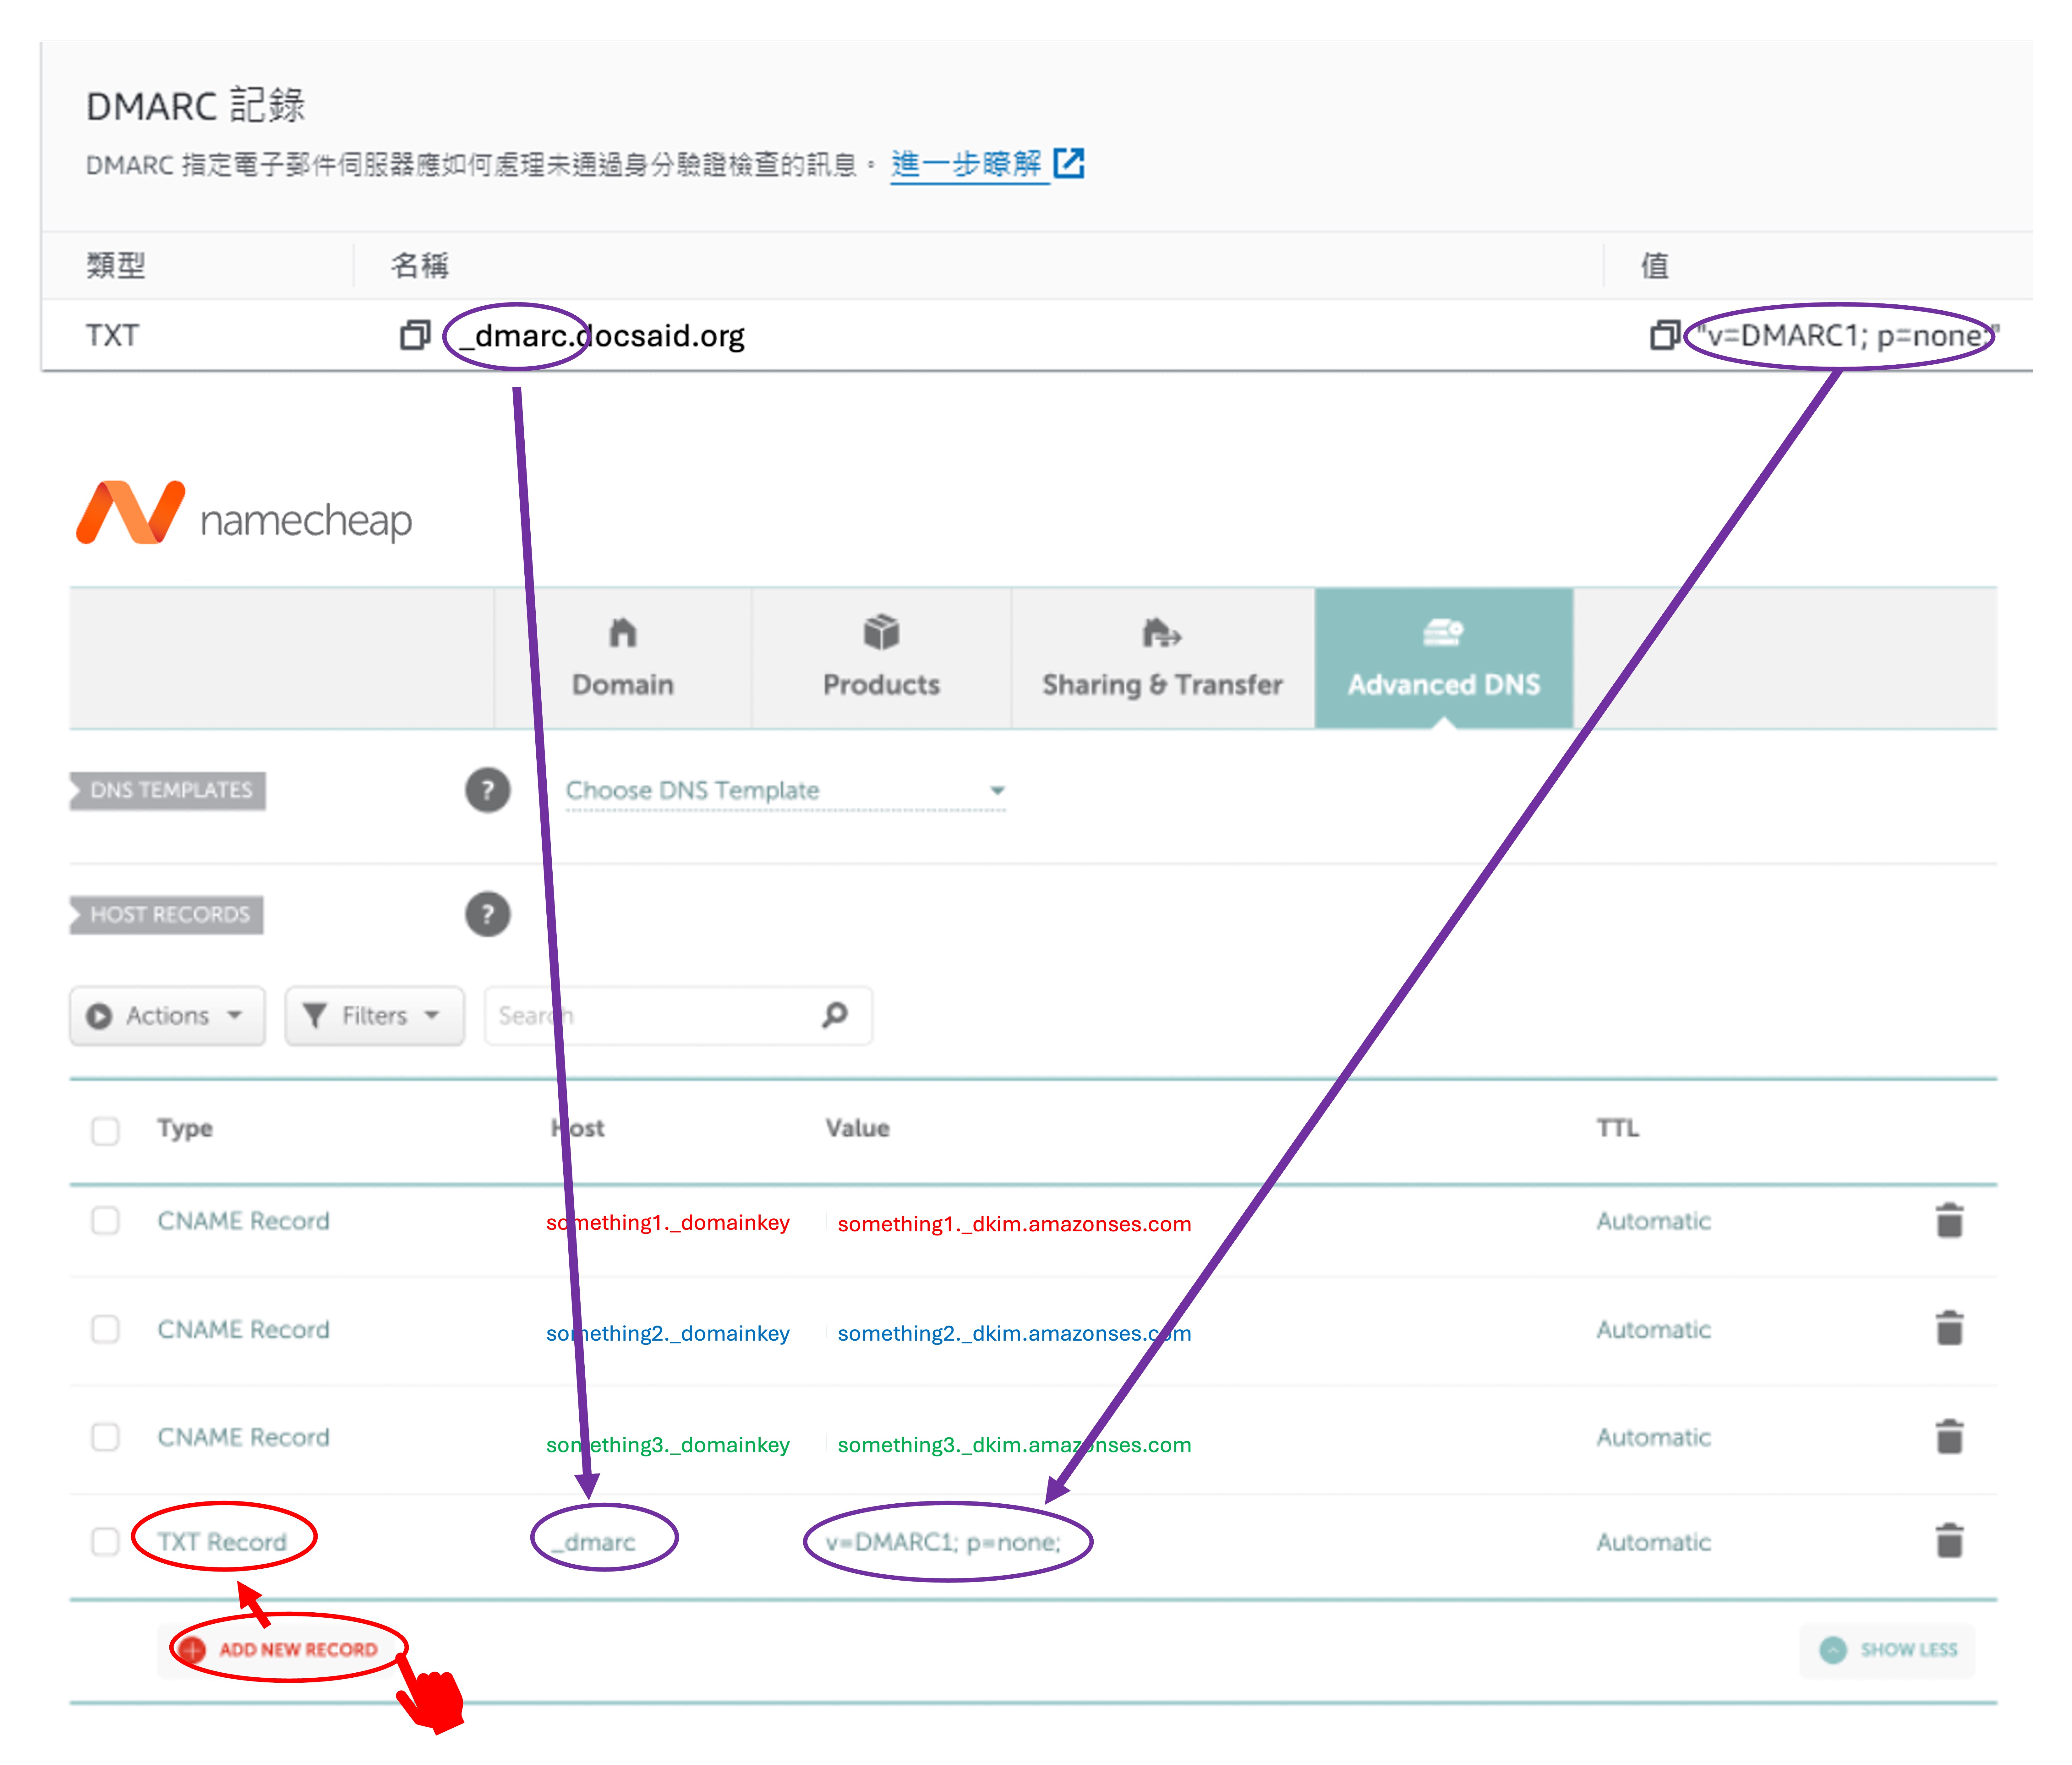
This is the easiest part to configure. In Namecheap's "Advanced DNS" section, click "Add New Record" and select "TXT Record".
Enter the DMARC record provided by Amazon SES. The only thing to keep in mind is not to include quotation marks (") in the value.
Summary
At this point, we have completed the Amazon SES DNS setup on Namecheap.
After completing the setup, wait for about 30 minutes. Amazon SES will automatically verify your DNS records. If everything is set up correctly, you will receive an email notification from Amazon SES confirming a successful verification.
Good luck! Your support keeps my AI & full-stack guides coming. From idea to launch—efficient systems that are future-ready. Need a tech partner or custom solution? Let's connect.☕ Fuel my writing with a coffee
![]()
![]()
AI / Full-Stack / Custom — All In
All-In Bundle
🚀 Ready for your next project?