Nginx Configuration
We will use Ubuntu as an example to install Nginx and set up basic configurations.
For other operating systems, please refer to the official documentation or other resources for installation.
Installing Nginx
First, update the software repository and install Nginx:
sudo apt update
sudo apt install -y nginx
Once installed, the Nginx service will start automatically.
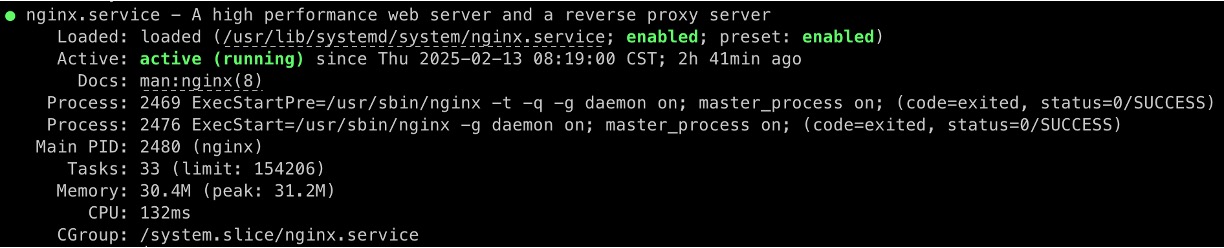
We can check if Nginx is running properly using systemctl:
sudo systemctl status nginx
If it shows active (running), it means Nginx has started successfully.
If the server has a firewall enabled (such as UFW), ensure that HTTP and HTTPS traffic are allowed:
sudo ufw allow 'Nginx Full'
Nginx Configuration
Main File
The main configuration file for Nginx is /etc/nginx/nginx.conf.
For detailed usage, please refer to our supplementary documentation: nginx.conf
Due to space constraints, the detailed explanation is provided separately. Be sure to check it out. ⬆ ⬆ ⬆
Site Files
For each website or service, we typically configure them in two directories:
/etc/nginx/sites-available/: Create individual configuration files./etc/nginx/sites-enabled/: Enable sites through symbolic links.
Nginx uses the sites-available and sites-enabled directories to manage configurations for multiple sites.
For detailed usage, please refer to our supplementary documentation: sites-available/default
Again, make sure to check out the explanation file. ⬆ ⬆ ⬆
Testing and Verification
After completing the configuration, it's essential to verify if the setup is correct:
-
Check Nginx Configuration Syntax
sudo nginx -tIf it shows
syntax is okandtest is successful, the configuration is correct. -
Reload Nginx to Apply New Configuration
sudo systemctl reload nginx -
Verify the Service
Use a browser or
curlto accesshttp://temp_api.example.com/testand check if the expected response is received.
Please note that the http://temp_api.example.com/test endpoint is based on the hypothetical API endpoint from the previous section.
You should modify the server_name and proxy_pass settings in the configuration file according to your actual setup.
Common Commands
# Start Nginx
sudo systemctl start nginx

# Stop Nginx
sudo systemctl stop nginx

# Restart Nginx (typically used for major configuration changes)
sudo systemctl restart nginx

# Reload Nginx (recommended for minor configuration changes)
sudo systemctl reload nginx
Multi-Site Configuration
Nginx uses server blocks to define virtual hosts, and it determines which site to process based on the requested Host and listen port. When a user sends an HTTP request, Nginx first compares the requested "Host" and "Port" with the configured server blocks and processes the matching one.
Typically, each site is configured to listen on a specified port (like 80 or 443) with the listen directive, and the server_name directive is used to match a specific domain. For example, example.com and api.example.com can each have their own server_name, and Nginx will select the appropriate configuration based on the Host header.
Here’s an example of a typical multi-site configuration:
server {
    listen 80;
    server_name example.com;
    root /var/www/example.com;
    index index.html;
}

server {
    listen 80;
    server_name api.example.com;
    location / {
        proxy_pass http://localhost:5000/;
        proxy_set_header Host $host;
        proxy_set_header X-Real-IP $remote_addr;
        proxy_set_header X-Forwarded-For $proxy_add_x_forwarded_for;
        proxy_set_header X-Forwarded-Proto $scheme;
    }
}
- The first
serverblock handles static resources forexample.com. - The second
serverblock handles requests forapi.example.comand proxies them to the local API service running on port5000.
For example, when users access http://example.com, Nginx will route the request to the index.html file in /var/www/example.com; when they access http://api.example.com, the request will be forwarded to the API service on port 5000.
Default Configuration
We can set up a default_server in the configuration file, so when there is no matching server_name, Nginx will use the default server to handle the request:
server {
    listen 80 default_server;
    server_name _;
    return 404;
}
This configuration prevents requests with unspecified domain names from being routed to the wrong site.
Troubleshooting
Finally, let's take a look at how to troubleshoot when issues arise.
-
Check Nginx Configuration for Errors
sudo nginx -tIf there are error messages, follow the instructions to fix the configuration.
-
Check Nginx Service Status
sudo systemctl status nginxIf it shows
active (running), Nginx is running normally; if it showsfailed, check the error logs. -
View Error Logs
sudo journalctl -u nginx --no-pager --lines=30Or directly view the
error.log:sudo tail -f /var/log/nginx/error.logThese logs help identify specific errors like 404, 502, 403, etc.
Conclusion
In this chapter, we covered how to install Nginx on Ubuntu and configure basic sites, reverse proxy, and multi-site management.
We also learned how to test and verify configurations to ensure the website is functioning correctly. With these basic settings, Nginx can meet the needs of most static websites and API proxies.
In the next chapter, we’ll look at how to configure HTTPS and use Let's Encrypt.