Quick Start
We provide a simple model inference interface, including the preprocessing and postprocessing logic.
First, you need to import the required dependencies and create a DocAligner class.
Model Inference
We have designed an automatic model download feature. When the program detects that you are missing a model, it will automatically connect to our server for download.
Here is a simple example:
import cv2
from skimage import io
from docaligner import DocAligner
# build model
model = DocAligner()
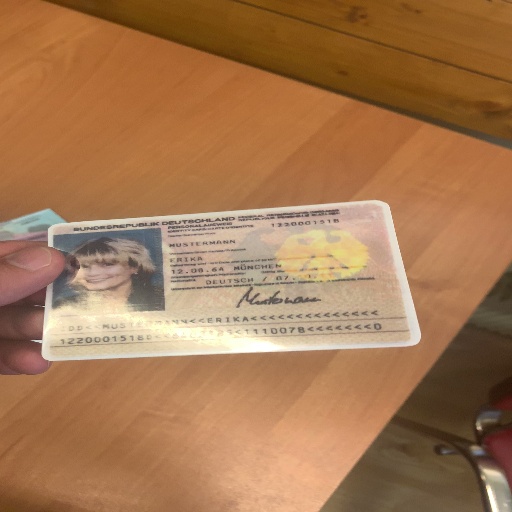
# read image
img = io.imread('https://github.com/DocsaidLab/DocAligner/blob/main/docs/run_test_card.jpg?raw=true')
img = cv2.cvtColor(img, cv2.COLOR_RGB2BGR)
# inference
polygon = model(img)
# output four corner coordinates of the document
# print(polygon)
# [[ 48.151894 223.47687 ]
# [387.1344 198.09961 ]
# [423.0362 345.51334 ]
# [ 40.148613 361.38782 ]]
In the example above, the image download link is available here: run_test_card.jpg
DocAligner is already encapsulated with __call__, so you can directly invoke the instance for inference.
In the latest version, the model directly returns results in numpy.ndarray format, which we believe offers more flexibility for users and facilitates subsequent applications.
Output Results
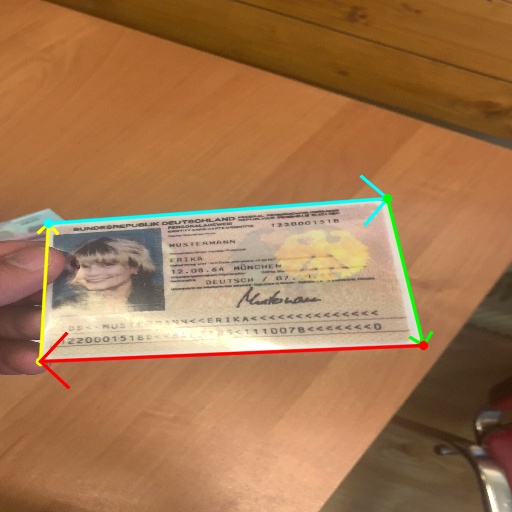
Draw Polygon
Draw and save the image with the document polygon.
import cv2
import numpy as np

def draw_polygon_image(
    img: np.ndarray,
    polygon: np.ndarray,
    thickness: int = 3
) -> np.ndarray:

    colors = [(0, 255, 255), (255, 255, 0), (0, 255, 0), (0, 0, 255)]
    export_img = img.copy()
    _polys = polygon.astype(int)
    _polys_roll = np.roll(_polys, 1, axis=0)
    for p1, p2, color in zip(_polys, _polys_roll, colors):
        export_img = cv2.circle(
            export_img, p2, radius=thickness*2,
            color=color, thickness=-1, lineType=cv2.LINE_AA
        )
        export_img = cv2.arrowedLine(
            export_img, p2, p1, color=color,
            thickness=thickness, line_type=cv2.LINE_AA
        )
    return export_img

# draw
export_img = draw_polygon_image(img, polygon)
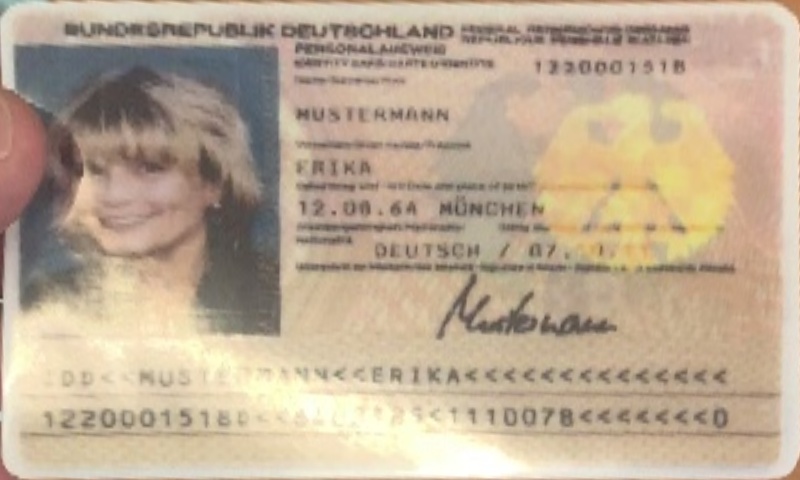
Extract Flattened Image
If you know the original size of the document, you can call the Capybara.imwarp_quadrangle method to convert the document polygon image into a rectangular image.
- Refer to the source code: Capybara.imwarp_quadrangle
from capybara import imwarp_quadrangle

H, W = 480, 800
flat_img = imwarp_quadrangle(img, polygon, dst_size=(W, H))
The result will look like the image below:
If it's an unknown image type, you can omit the dst_size parameter, and the smallest "rectangular" image based on the document polygon's boundaries will be calculated automatically, with the width and height set to W and H.
flat_img = imwarp_quadrangle(img, polygon)
When your document appears heavily tilted in the image, the smallest rectangle may be quite flat, causing some deformation during flattening.
Therefore, in such cases, it's recommended to manually set the dst_size parameter.
Why Can't the Model Detect the Document?
This is a difficult question to answer immediately, so we need to break it down step by step.
Below, we use an image from MIDV-2020 as an example, and readers can download this image for testing:
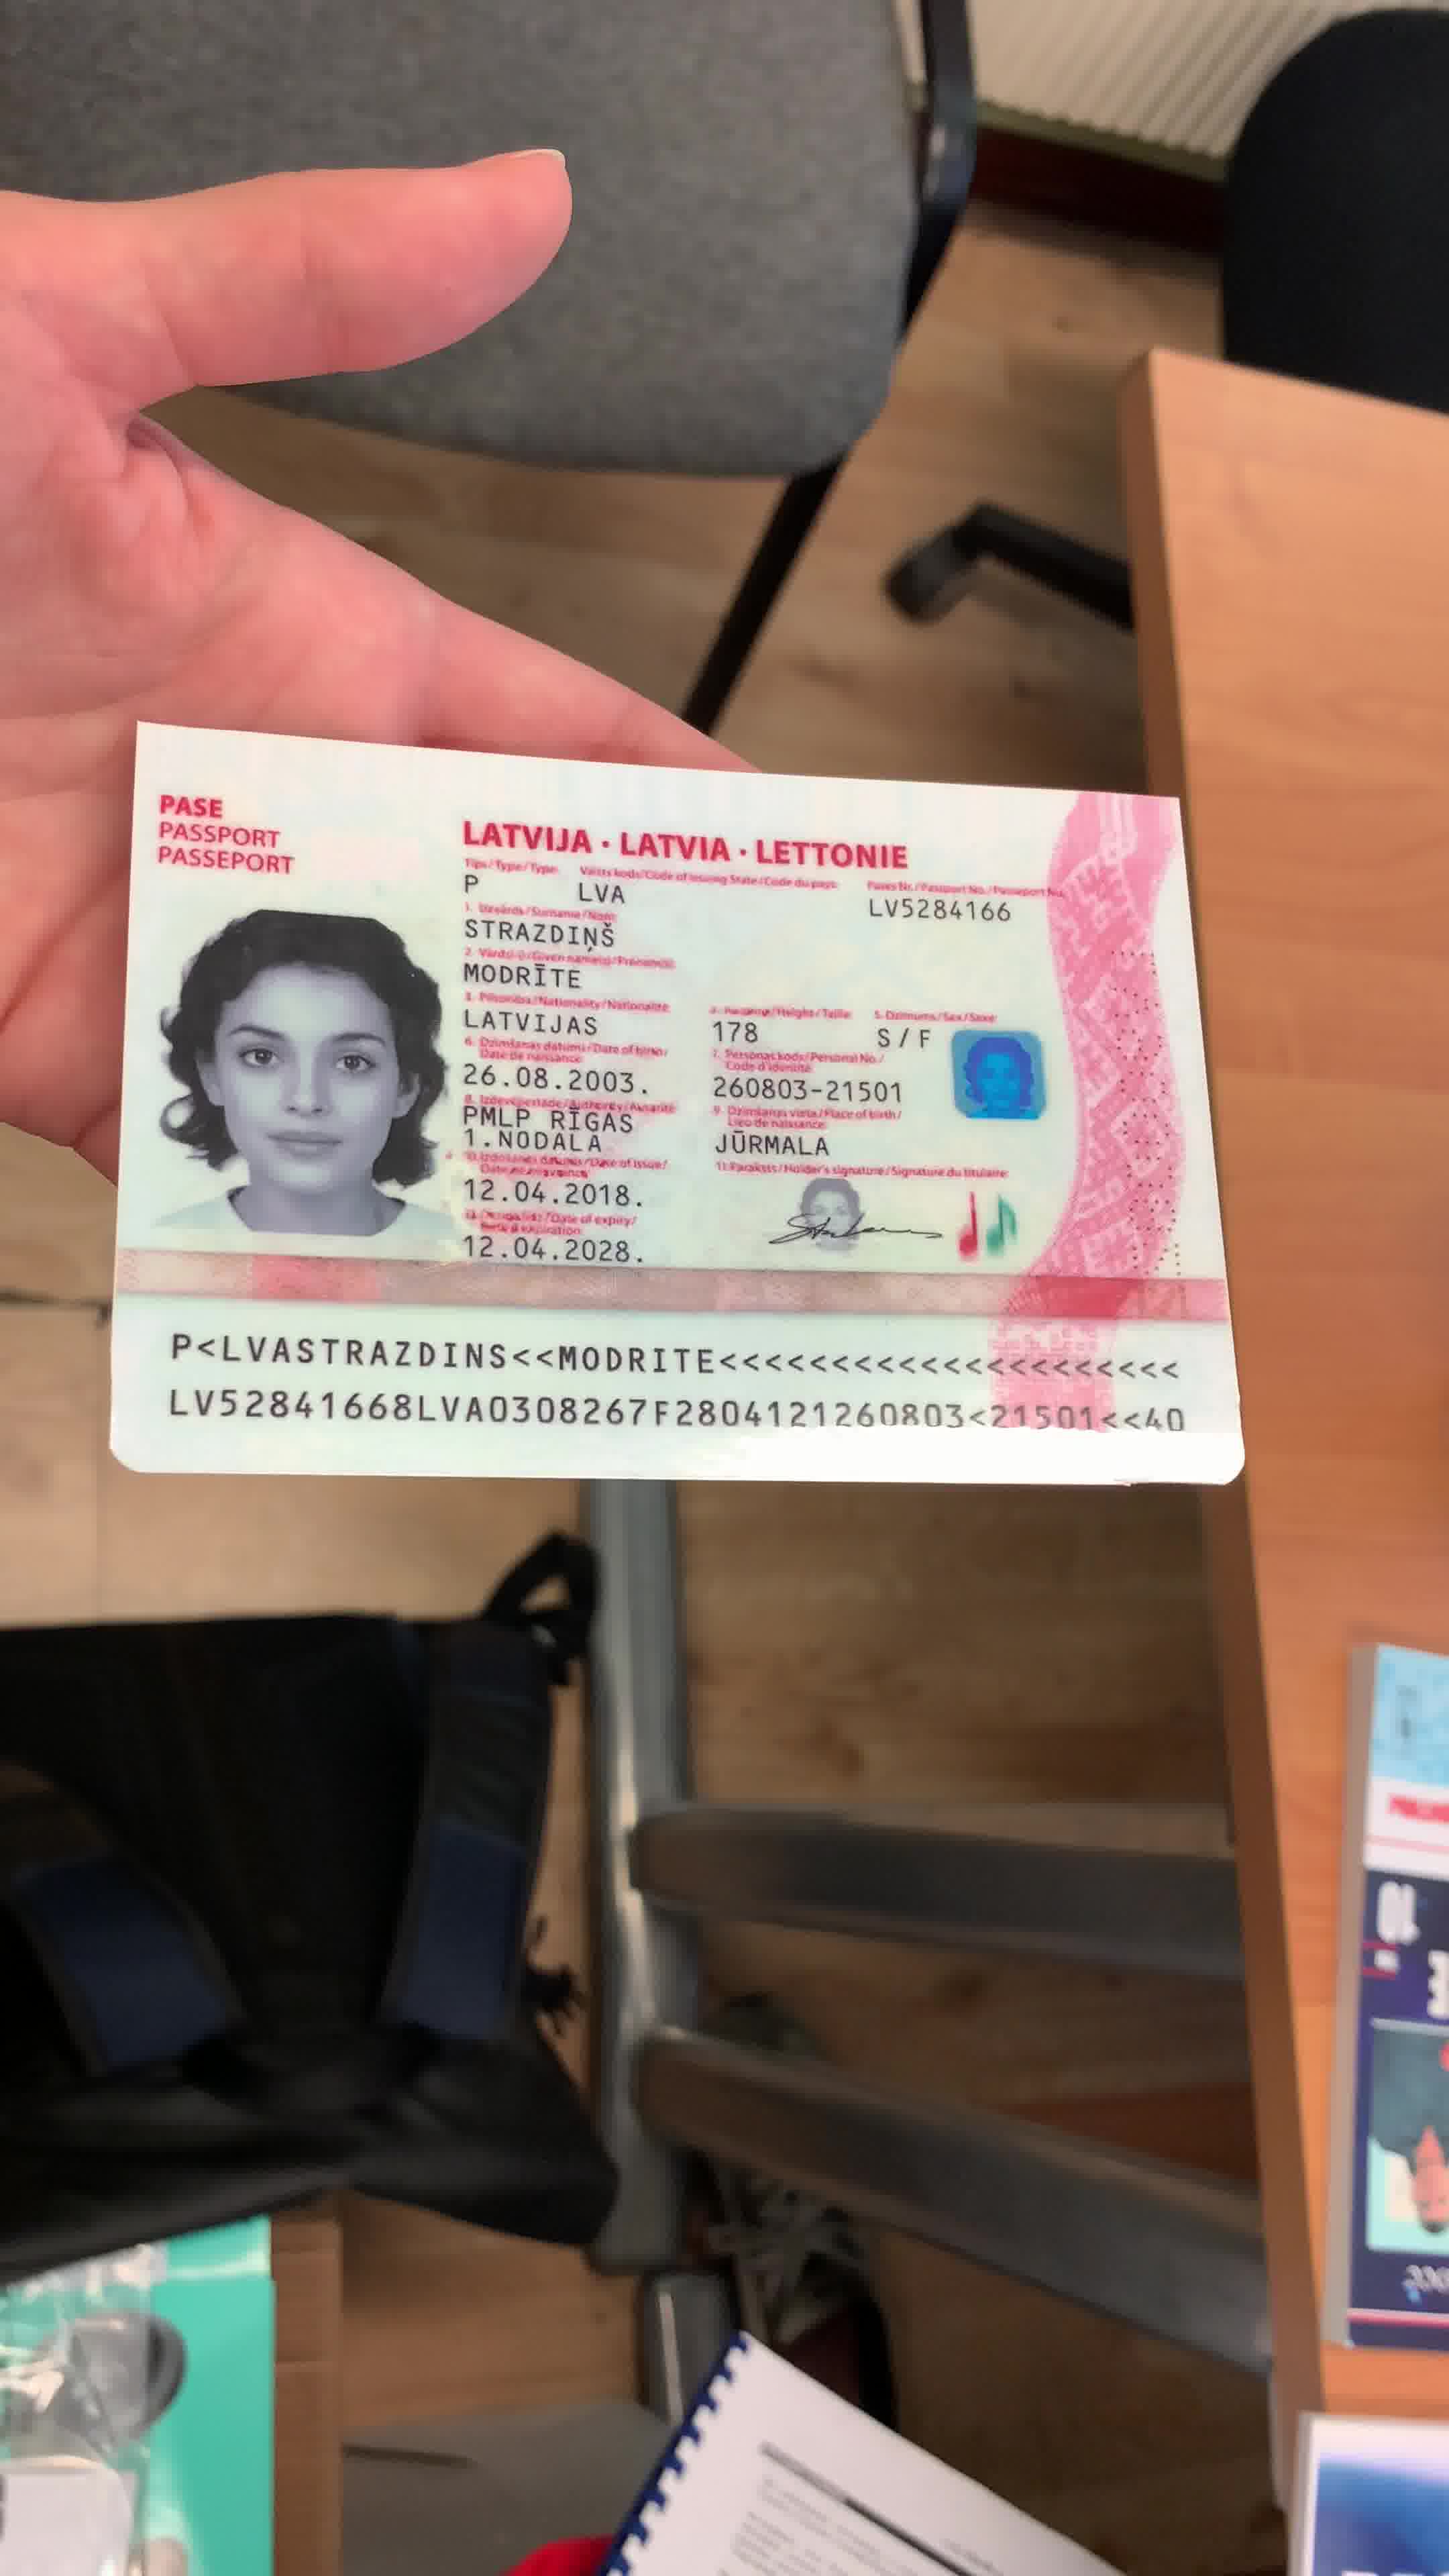
Document Size in the Image
The first thing to consider is the size of the document in the image. Documents that are too large or too small may cause the model to fail in detection.
We have reviewed the training data, and the scale of documents is generally between 1/2 and 1/8, as shown in the diagram below:
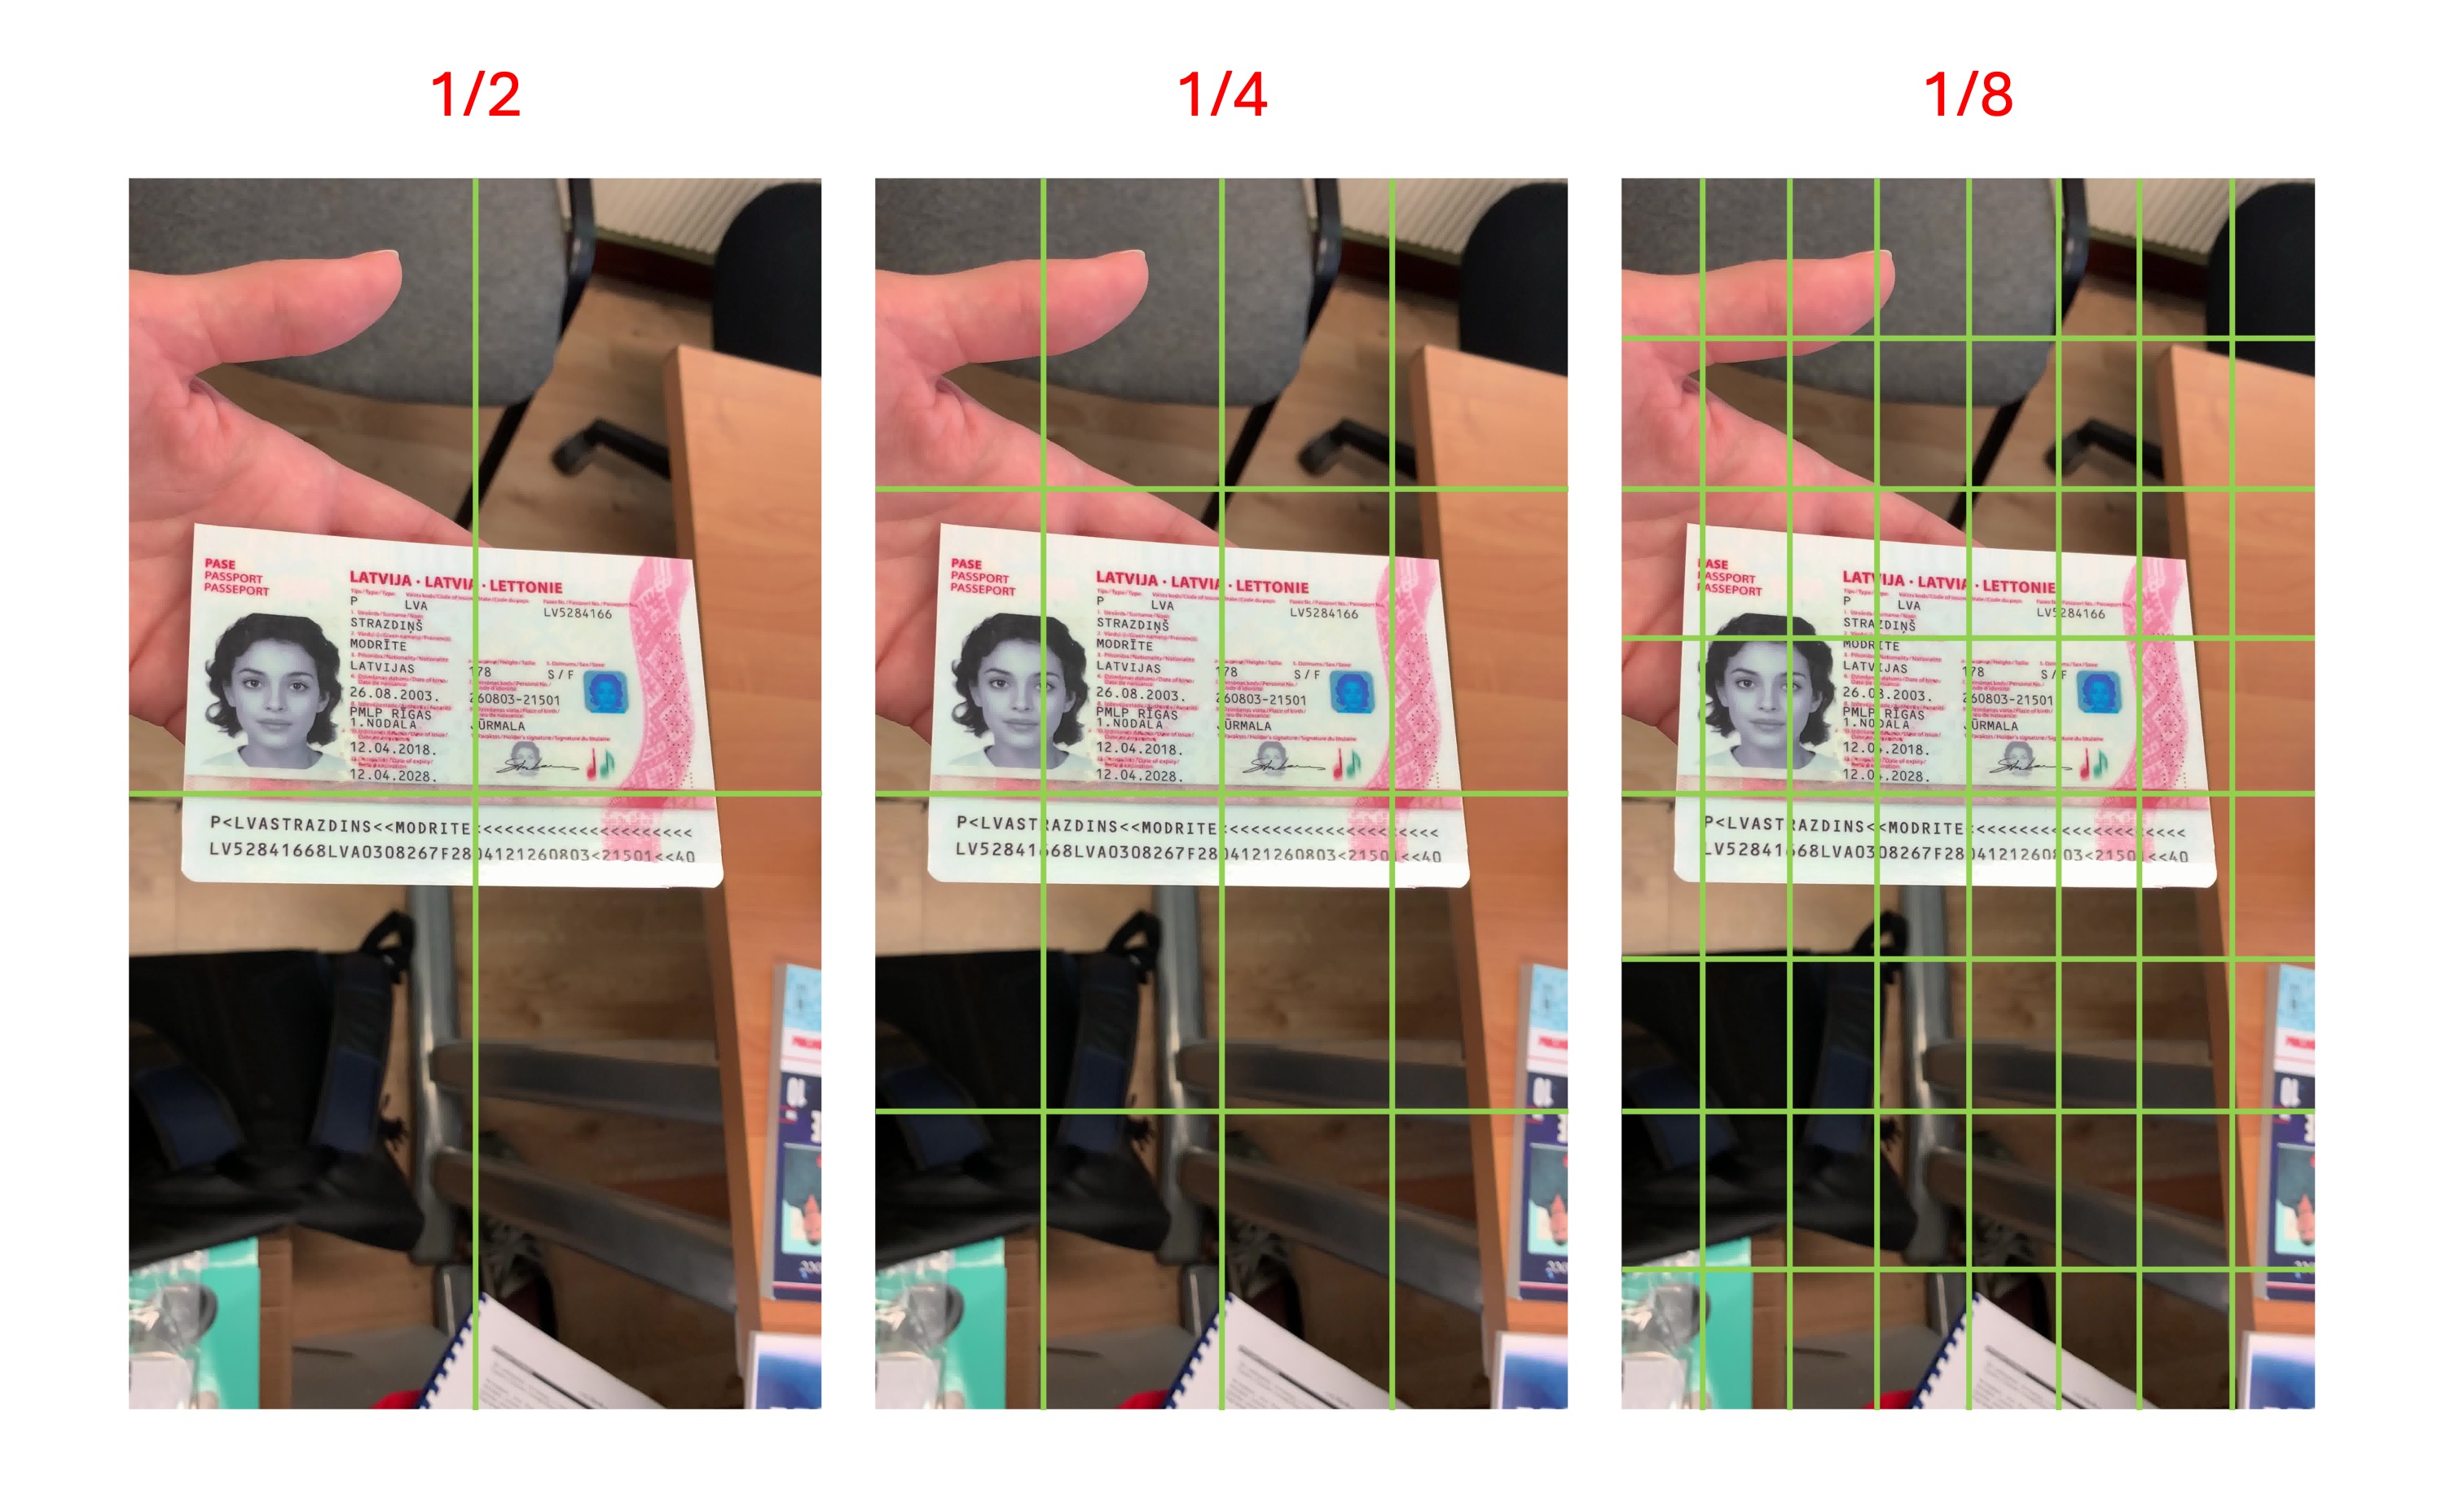
This means that if your document size in the image is smaller than 1/8 of the "single grid" size shown in the diagram above, the model is likely to ignore it, as it might consider it background.
We believe that detecting a document is for subsequent downstream tasks, so detecting very small documents may not be meaningful in practical applications. Therefore, we kept this characteristic when designing the training data.
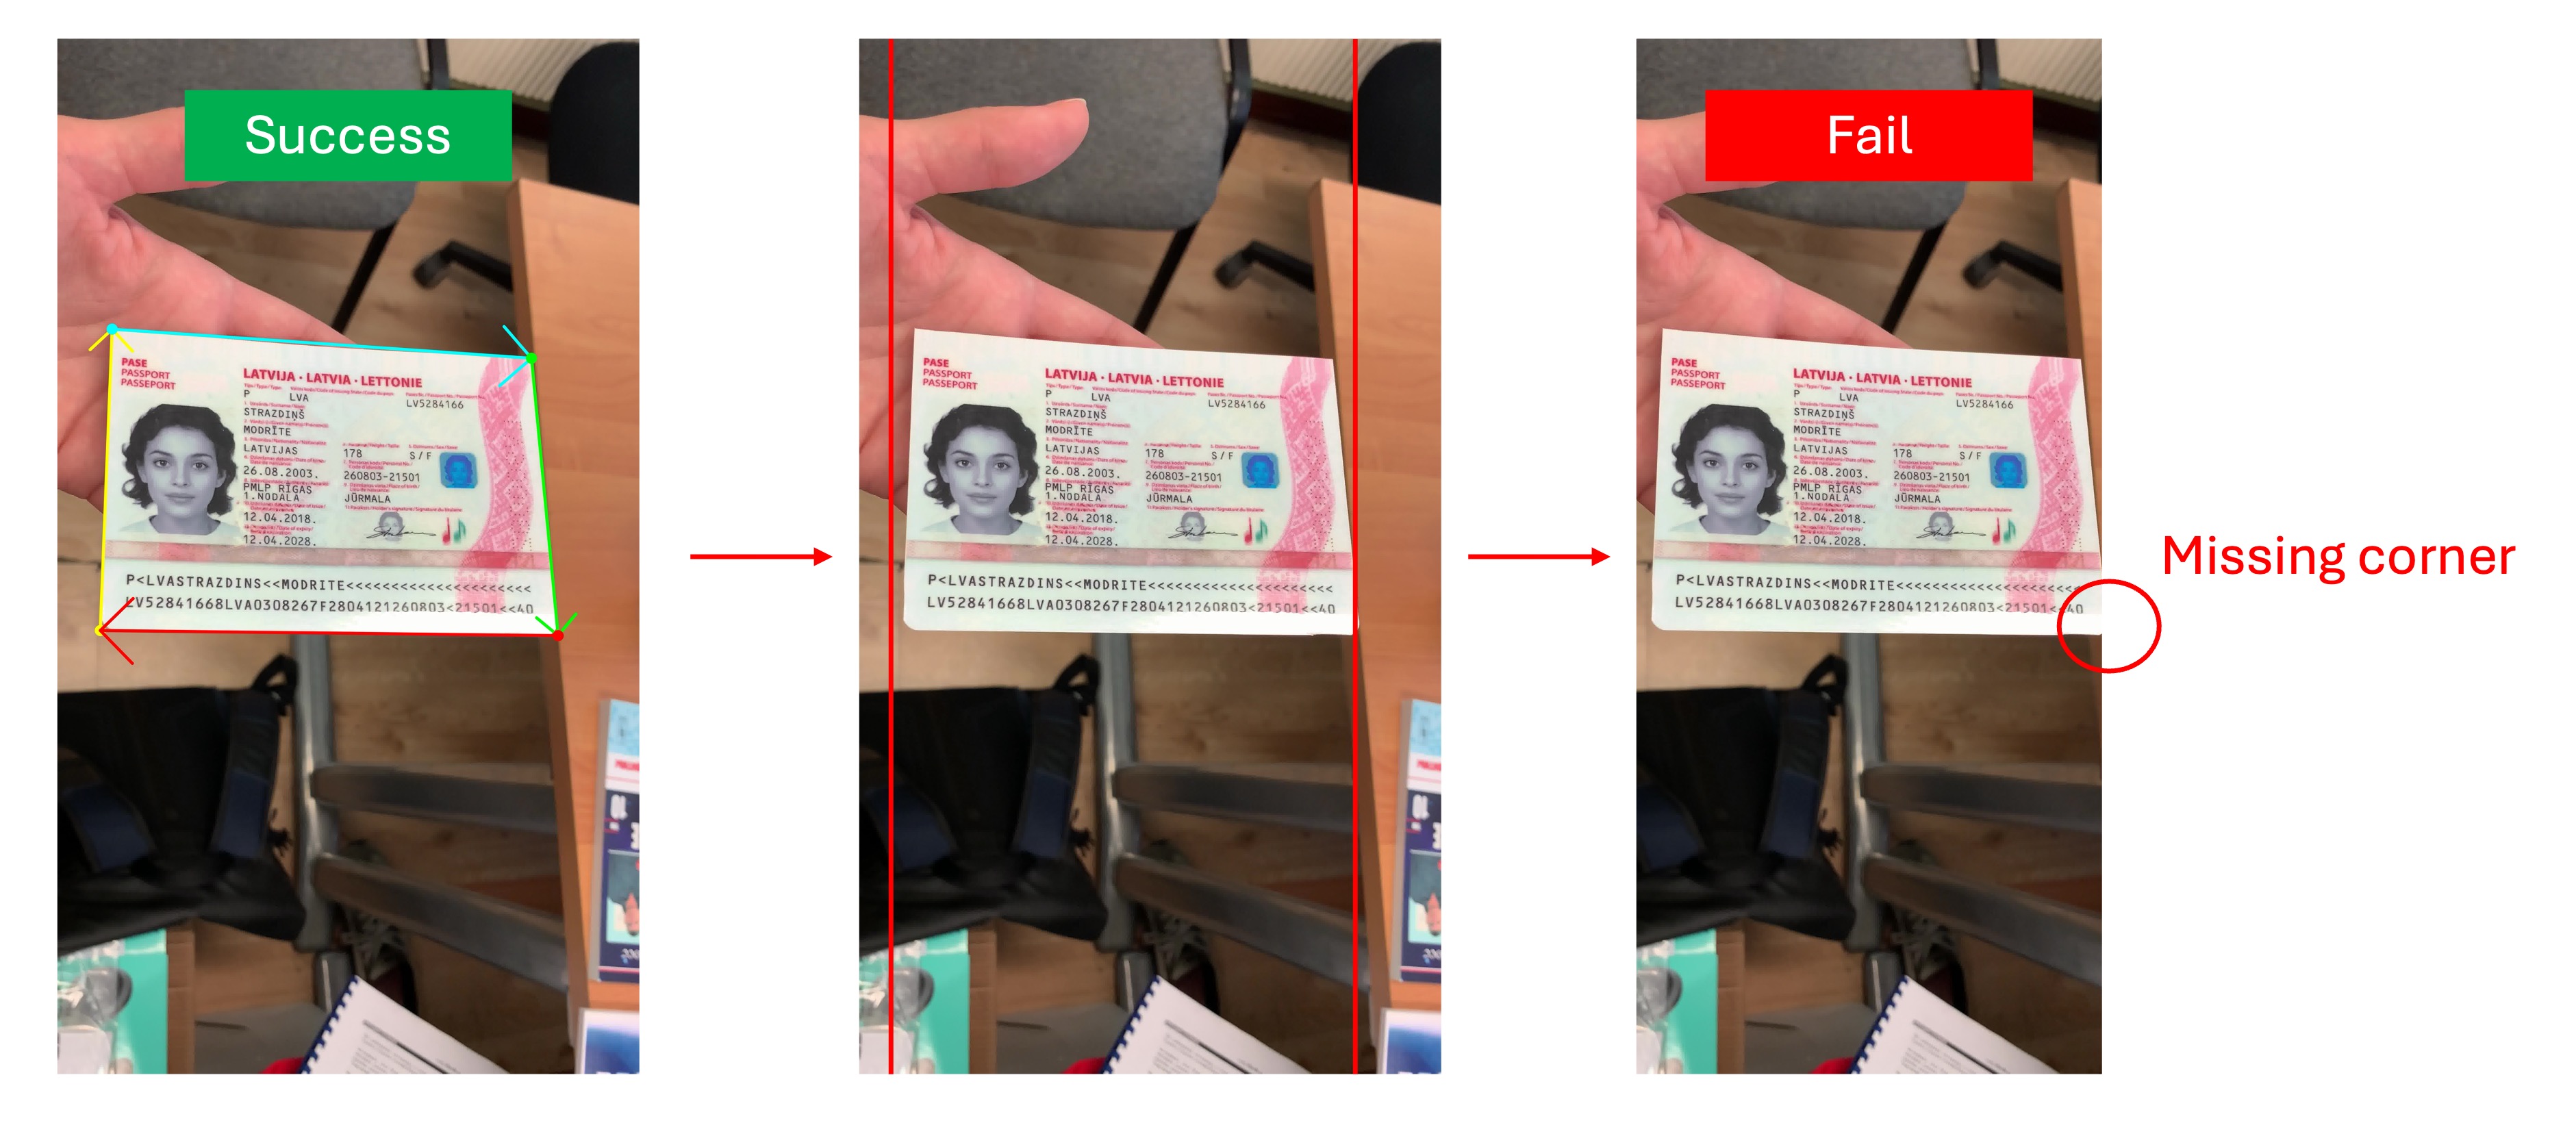
Missing Document Corners
A document that is too large generally does not affect the model. However, in this case, the document corners may be clipped by the image edge or extend beyond the image.
Since the model primarily performs corner detection, missing document corners will result in unstable estimation. If the missing corners are near the edges of the document, the model is likely to treat the document as invalid and will not output the Polygon result, as shown below:
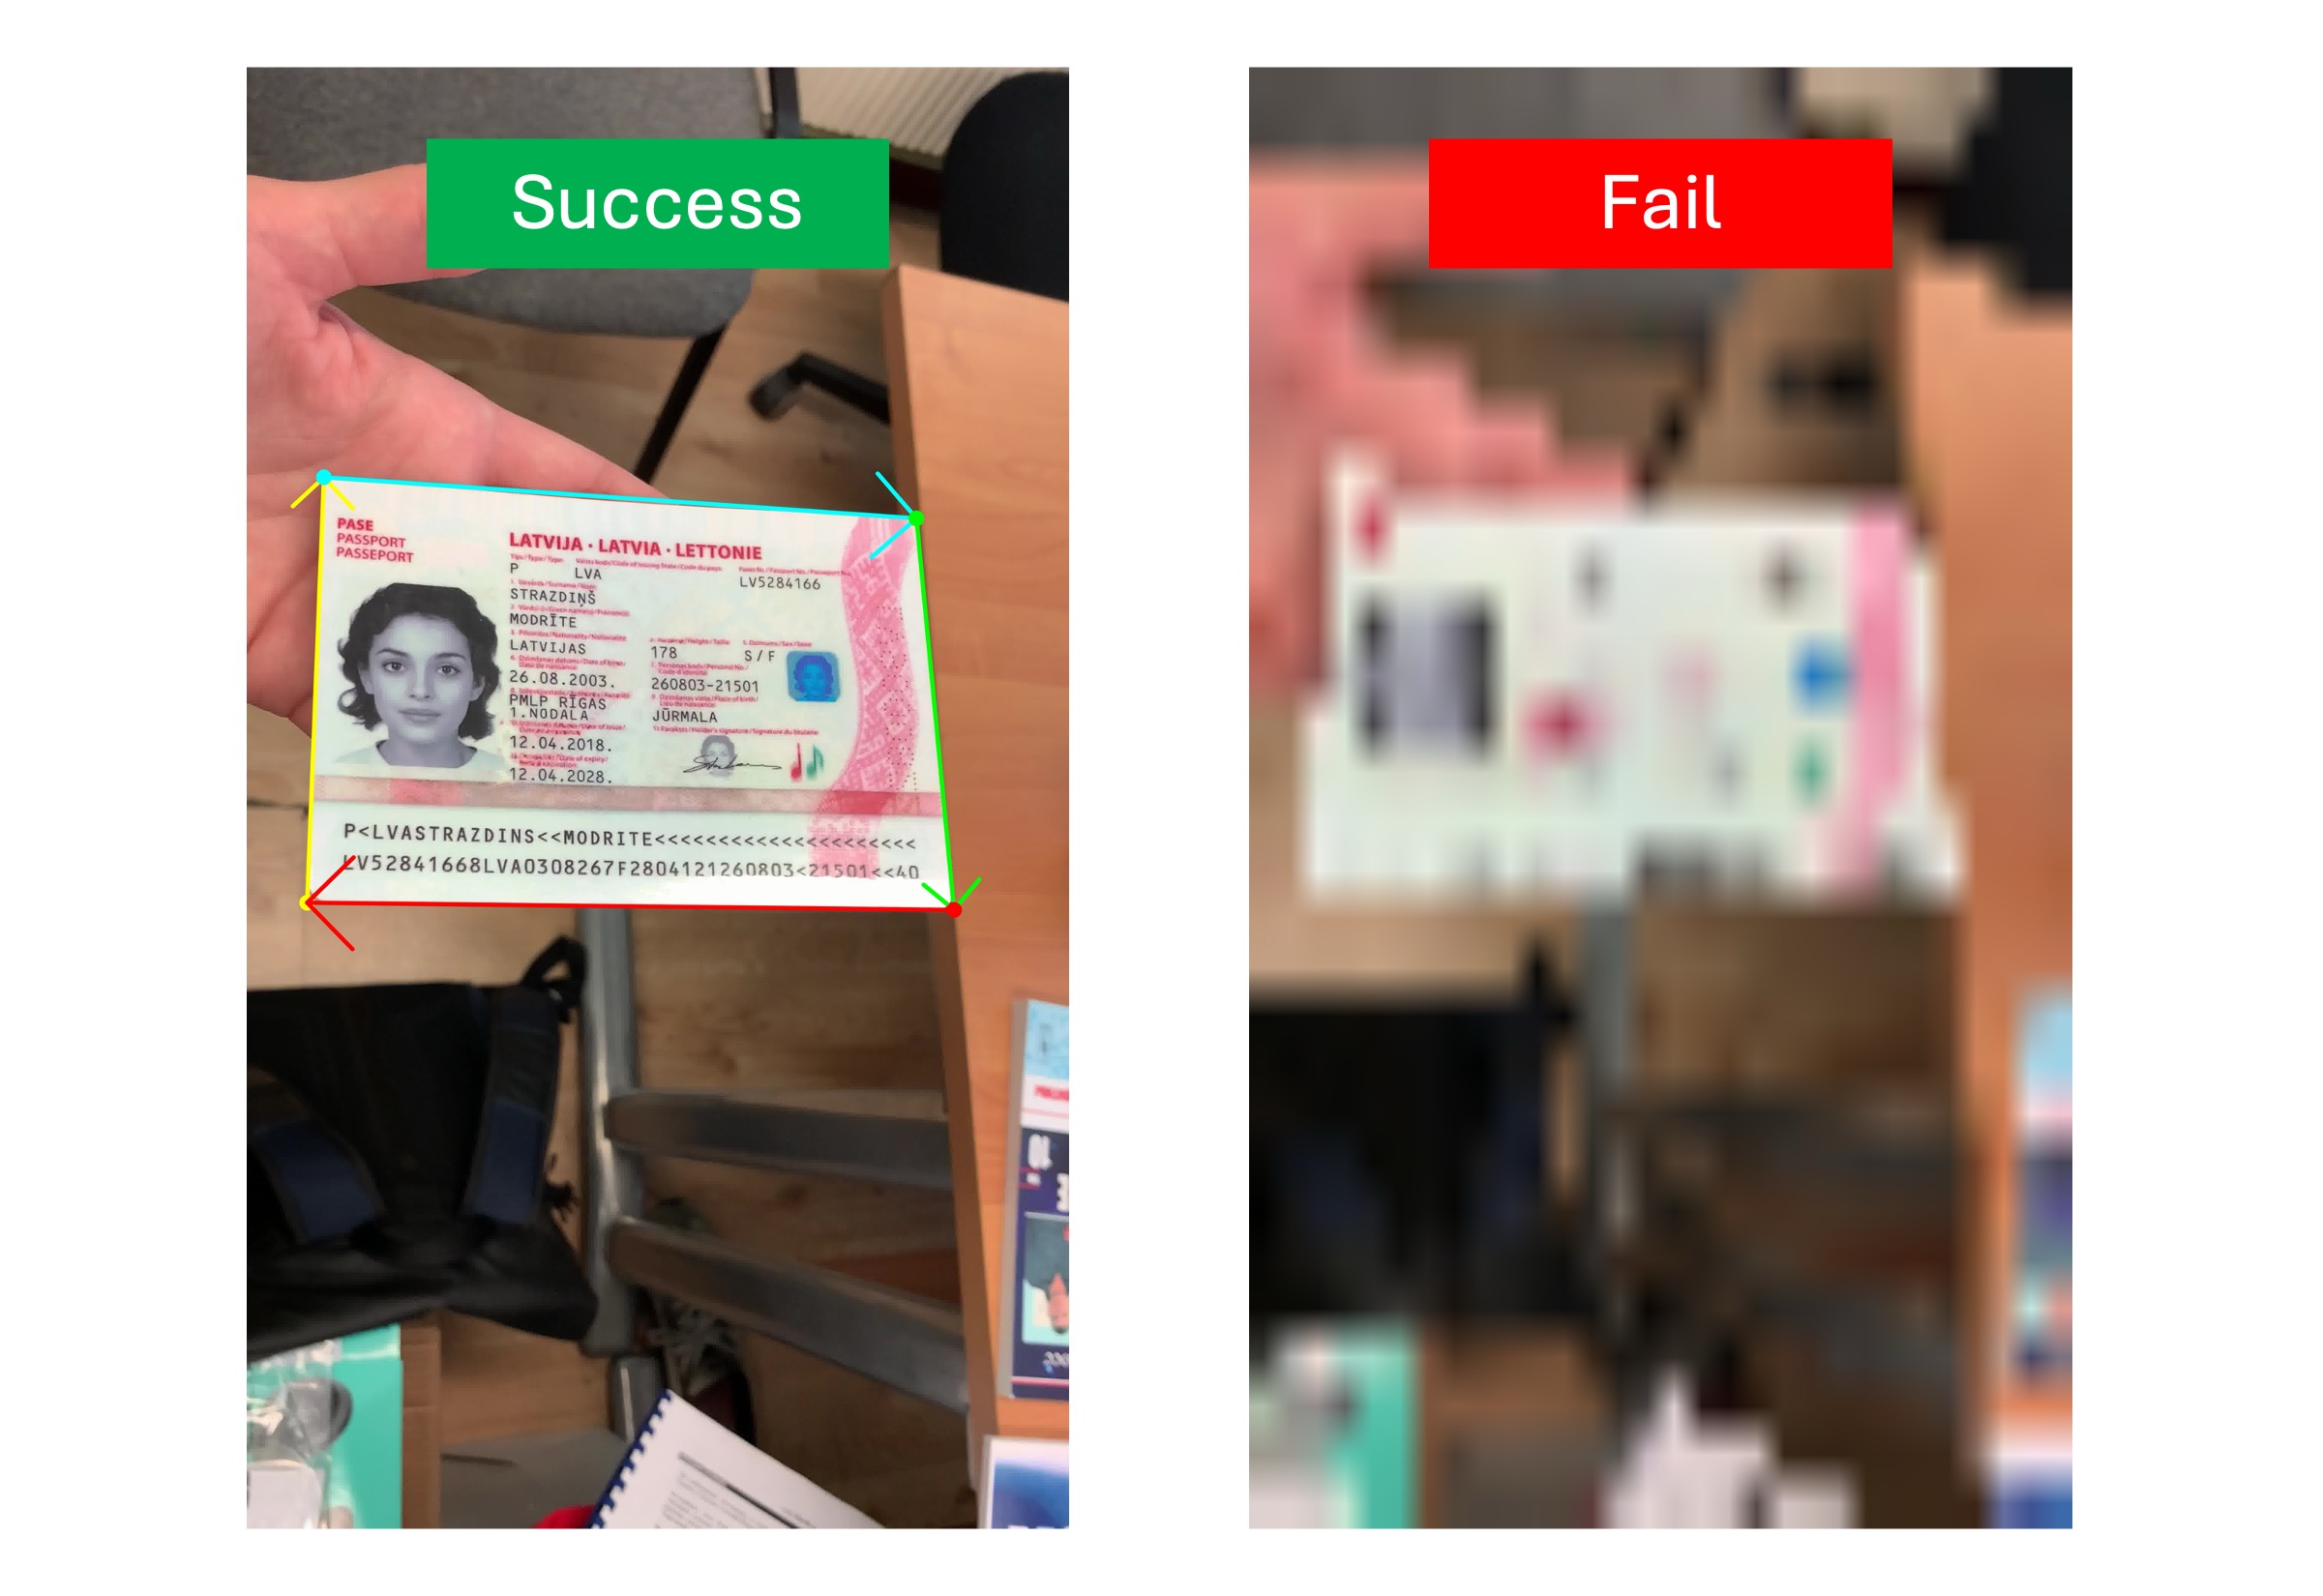
Blurry Document in the Image
Another reason for detection failure is a blurry document. A blurry document may prevent the model from finding the document's edges, leading to detection failure, as shown in the image below:
Document Not Recognized by the Model
The model we trained is relatively small, around 5MB to 20MB in size. Although it has some generalization ability, it may fail to detect special documents that were not included in the training dataset.
For example, suppose the blue calculator in the image below is a "special document":

When this image is passed to the model, an empty Polygon will be returned because the model does not recognize "calculator" as a document. The solution is to manually annotate this "special document," include it in the training dataset, and fine-tune the model.
Model Visualization
We haven't encapsulated this feature because it's just an intermediate process, and there are other image postprocessing steps afterward.
However, if you're really interested, here's some example code for visualizing the model's output. If you're using a heatmap model, you can visualize the output as follows:
import cv2
import numpy as np
from capybara import imresize, imread
from docaligner import DocAligner
from docaligner.heatmap_reg.infer import preprocess

model = DocAligner()

img = imread('midv2020_example.jpg')

img_infos = preprocess(
    img=img,
    img_size_infer=(256, 256)
)

heatmap = model.detector.model(**img_infos['input'])['heatmap'][0].sum(0)
heatmap = np.uint8(heatmap * 255)
heatmap = imresize(heatmap, size=img.shape[:2])
heatmap = cv2.applyColorMap(heatmap, cv2.COLORMAP_JET)
output = cv2.addWeighted(img, 0.5, heatmap, 0.5, 0)
D.imwrite(output)
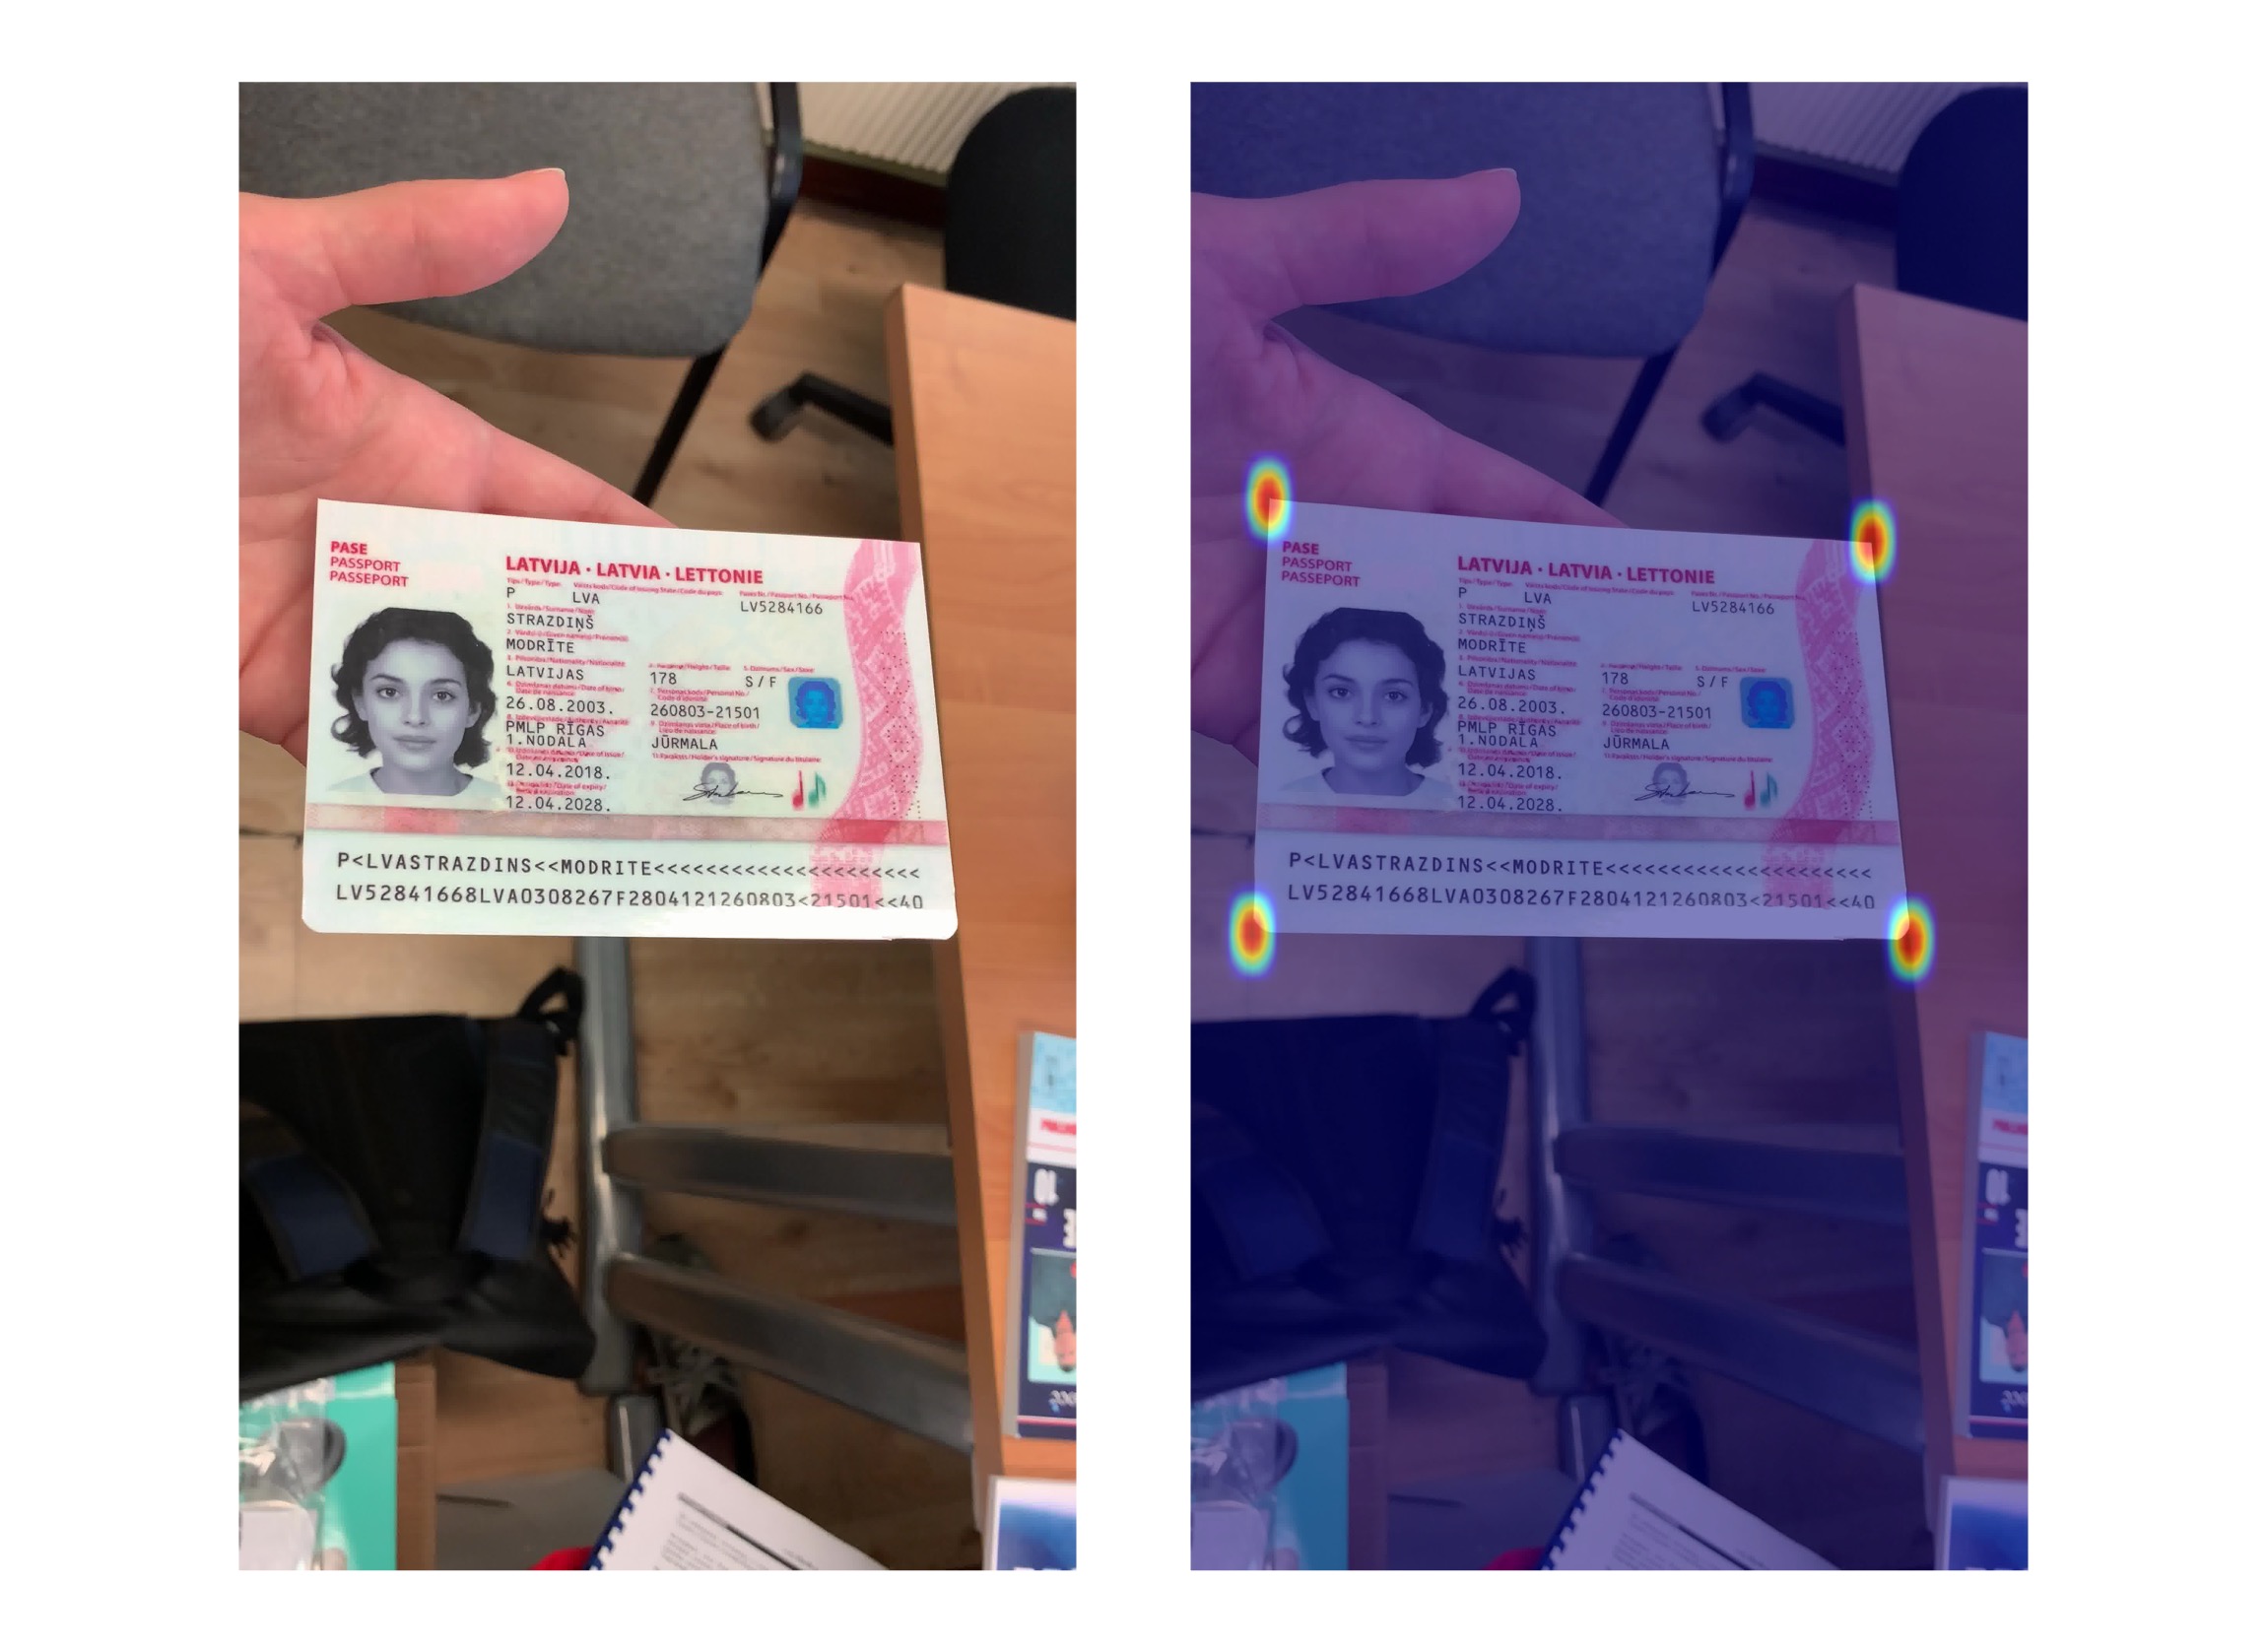
By running the code above, you can see the model's output, which is a heatmap. The deeper the color, the more likely that area is a document corner. In cases of detection failure, you might be able to spot the issue in this image.
Contact Us
If the above answers are not helpful, perhaps you can email us the image you think has issues. If we have time, we will help you check it.
Please contact us via email: docsaidlab@gmail.com